Bird feeder made from pencils. Bird feeder: ideas and the best options for how to arrange it yourself (105 photos). Assembling a wooden feeder is carried out in several stages
A feeder is not only a great way to feed our bird friends. If you approach the issue of making it creatively, you can create a real one. We offer a selection of ideas that will tell you how to make a bird feeder with your own hands. And master classes from the editors of HomeMyHome.ru will help you learn the intricacies of manufacturing and reveal the secrets of constructing drawings.
Depending on what goals you pursue when making a feeder, the following types of its design differ.
- Tray. The simplest type of feeder. The elementary design involves a small pallet with sides, secured to a tree with a strong thread or fishing line;

Making such a “bowl” is not difficult, especially if you have a regular clothesline and clothesline on hand. One of the disadvantages is that in strong winds, such structures tip over, and all the food ends up on the ground.
- Platforms with dispenser– an improved model of the previous type of feeder. It consists of a tray where the birds will feed, and a sealed container with a mechanism for gradually supplying food as it decreases. As a rule, the dispenser is made from an ordinary plastic bottle, attached to the tray with the hole down at a short distance so that the food pours out on its own. Of course, such feeders are more difficult to make, but the end result is a high-quality, convenient and durable design.

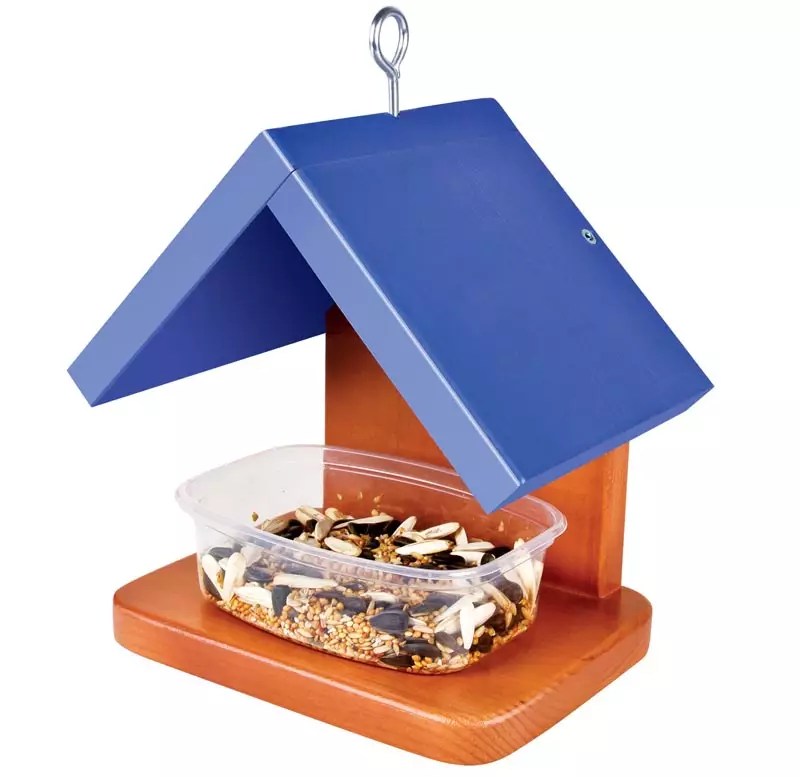
- Houses − the most common feeders of all species diversity. In addition, if you approach the issue of creation creatively, you can make a real shelter for birds and an original one for yourself.

- Hopper feeders somewhat similar to birdhouses. They are completely enclosed structures with “windows” for birds. If you take some precautions, birds will even be able to hide in them from bad weather, and not just have a snack.
1 of 6


Inspired by ideas for creating simple feeders? If yes, then our small master classes are for you.
Related article:
How to make a birdhouse yourself, how to decorate it and install it correctly, photo examples of creative houses - read in our publication.
How to make feeders for street birds with your own hands - description and drawings
As we have already seen, you can make feeders from absolutely various materials- literally, everything that is at hand. It's a little more difficult to work with wood. But nothing is impossible, the main thing is that there is a desire. Let's consider different variants execution of bird feeders.
Interesting DIY bird feeder made of wood
We offer step-by-step instructions on how to make a beautiful bird feeder house yourself, as in the photo below.

The main material is small logs, which can be cut from ordinary cuttings for or rakes. Fast, cheap and original. All other parts are also made of wood. To bring such a masterpiece to life, in addition to raw materials, you will need a special wood drilling machine and. It will be possible to do it without them, but it’s not a fact that it will turn out just as neatly and beautifully.
| Illustration | Description |
 | We cut logs 30 cm long from the cuttings. You should get 36 pieces in total. 24 pieces - for the walls, and parts from the logs for the pediment. Remains are spare parts in case of damage to the main elements. |
 | We are preparing a machine with a wood crown of a suitable diameter to make recesses in the logs that will serve as fastenings for the future feeder. |
 | To ensure that the parts are similar and that the fastening recesses fit each other perfectly, it is best to make paired holes. To do this, we fasten the two blanks together with tape on both sides for better fixation and measure 3 cm from both ends. |
 | We make holes on the machine in the logs secured to each other at both ends. |
 | To assemble the house you will also need round wooden sticks. Sushi chopsticks are ideal, but not flat, but round. In accordance with their diameter, we make a hole in each recess of the log. And we begin to assemble the walls of the house. |
 | When you are finished with the construction, make sure that all the walls are even and glue the logs together. |
 | We cut out a template for the future roof from plywood. The size and slope depend on the design of the resulting house frame. |
 | Using the template, we cut the logs obliquely on both sides. We make a hole in the middle for the stick and glue the resulting structure. On the front side, if desired, we make a hole in the “attic”. Also, to give the structure rigidity, we put in a transverse beam and glue it. |
 | The roof can be made from any available sheet material. In our case, we used moisture-resistant plywood. Small parts were cut out to fit the resulting house. |
 | Let's start decorating the house - doors, canopy, attic. All this is done by hand from leftover plywood. In handicraft stores you can purchase various decorative items, such as a door lock. In our case, the door is simply glued to the wall. |
 | We make a pallet for the house from ordinary ones. |
 | It is best not to twist them together, but to glue them together, as shown in the photo. |
 | We paint the house, make sides on the pallet so that the food does not spill out, and you can hang the resulting food in the garden. |
If you have any questions, you can find answers to them in the video provided.
DIY bird feeder made of plywood
To make a feeder out of plywood, you will need special tools to work with it, such as a jigsaw, wood glue, tape measure, pencil, construction angle and glue. Let's make a bunker-type feeder small size, approximately as in the drawing below. They simplified it a little by placing only two walls, which will be held together to form a triangle shape.

All work takes place in several stages. Use a jigsaw to cut out the necessary parts. Their sizes and shapes are shown in the photo below.

We attach small blocks along the edges of the bottom so that their total height is approximately 5-7 cm.
Attention! We mount the blocks along the 27 cm long side so that there are small indentations along the edges - no more than 7 mm.

To the side where the indents are made, we mount the side walls. To make the entire structure stable, we reinforce it along the connection of the side parts with a block.


Treat the resulting feeder with impregnation so that the plywood does not deteriorate as long as possible under the influence of precipitation and temperature changes.
How to make a feeder out of a box - quickly and easily
A bird feeder made from a cardboard box is an option for those who want to do everything as quickly and simply as possible.


All that remains is to choose a stronger box, cut a hole in it for the birds, work out the mounting method - and the design is ready. It's a pity that it will lose its shape very quickly. But this is a fixable matter and costs practically nothing.
Master class on how to make a feeder from a plastic bottle
Plastic bottles are one of the most common recycled materials, suitable for making all sorts of useful things with your own hands. Feeders are also no exception. We offer step by step instructions making a cute and durable feeder. For this you will need:
- plastic bottles of 1.5 and 2 liters;
- scissors;
- lighter;
- spray paints;
- glue gun;
- glue "Moment";
- wire.

| Illustration | Description |
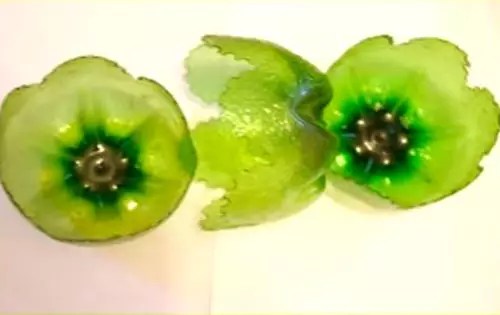 | We cut out the bottoms of three two-liter bottles. To make it look more interesting, you can cut out the edges with petals and burn them with a lighter, getting a wavy edge. |
 | We make a hole in the middle of the bottoms and string them on a wire. |
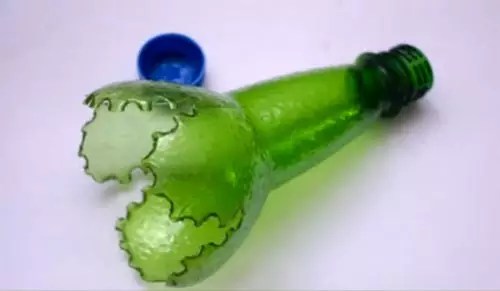 | We cut off the top of a one and a half liter bottle and, like the bottoms, we process the edges with a lighter. |
 | We string the neck onto a wire and paint the resulting structure with paint. |
 | Use a swab to paint the edges with a contrasting color. |
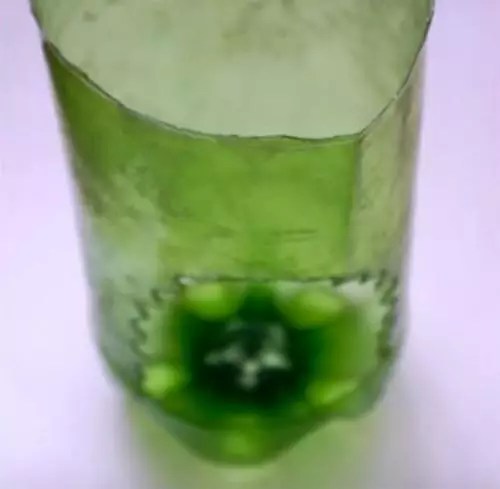 | We cut out the bottom part of a one and a half liter bottle, cut a hole and also singe it with a lighter. |
 | We connect the lower and upper parts with a glue gun. |
 | We cut out the weed from the remains of the bottles. And use a glue gun to attach them to the bottom. |
The bird feeder is ready. We pour more food there and watch the growth of the bird population in your garden.
We present to your attention several options for interesting bird feeders made by. It turns out that a feeder can be easily made from ordinary plastic bottles, all kinds of boxes, wood - if you wish. This article will try to awaken this desire in you, thanks to which many birds will be able to comfortably survive the winter.

First, let's look at the great variety of different feeders made from the most different materials. This will help you decide on the look and choose the option that suits you.

from a plastic bottle and glass jar


After all, with the help of wood, you can give the feeder any look: you can build a mini-castle, you can put an ordinary “dining room” on stands, you can decorate the feeder with intricate carvings, etc. as far as your imagination allows and you can find the necessary building materials.


It’s very good when children are involved in making things - they immediately develop character traits such as caring for their neighbors, love for animals, responsibility, they show an interest in making things, creating something!

Whatever you make your feeder from, it is important to know the basic (and mandatory) elements of the feeder:
1. Your feeder must have a roof - this way the food will remain dry and will not be covered with snow, and it will be easy for the bird to enjoy your treat;
2. Be sure to make the opening of the feeder wide enough; the birds are very shy, especially afraid of confined spaces. What if several hungry flyers arrive at your “bird canteen” for lunch? It is important to take care of this option;
3. When choosing a material for a feeder, be guided by its strength and moisture resistance: the denser and more moisture-proof the source material, the longer your feeder will last;
4. The feeder very often turns out to be too light, so it reacts to every gust of wind, while grains and crumbs scatter and the birds remain hungry. To cope with this problem, you need to make the feeder a little heavier. To do this, place a piece of plywood or linoleum on its bottom (strictly according to the size of the bottom).


Now you will learn how you can make a similar feeder yourself from all kinds of cereals.
This feeder looks great and at the same time does its job perfectly! Tree branches decorated with such “decorations” give your garden an aesthetic and exclusive look. So let's get started!
We will need:
All kinds of grains, crumbs, seeds - all raw, since fried ones will only harm the little flyers;
Egg;
Oatmeal;
Honey;
Gelatin;
Flour;
Pencil;
Thick cardboard;
Scissors;
Dense nylon thread.

1. Using a pencil and a regular sheet of paper, draw the shape of the future feeder. Hearts, stars, triangles, circles, squares - any geometric shapes - will look beautiful;
2. Cut out the paper blank with scissors and attach it to thick cardboard. Trace with a pencil and carefully cut along the contour;
3. Take care of preparing bird food in advance. Choose unroasted and unsalted grains, all kinds of bread crumbs;
4. Using a needle and thick nylon thread, make a hole in the cardboard base and thread the thread into it - with its help this “delicacy” will be attached to a tree branch;
5. To ensure that the grains and crumbs stick together and are properly attached to the cardboard base, start preparing natural glue:
- 2 tbsp. spoons of oatmeal (never oatmeal);
- 1 egg;
- 1 teaspoon of running honey;
- Flour.
All ingredients are thoroughly mixed in a bowl and left for 30 minutes. for swelling.
6. Apply the prepared adhesive mass to the base;
7. In another container, thoroughly mix all our grains;
8. Dip and roll our “glue” coated base in the resulting crumb-grain mixture;
9. Ready-made grain feeders must be placed in the refrigerator for several hours - the mass must harden well and acquire the necessary strength;
10. Hang these delicious “treats” on the tree branches and watch from afar the feast of birds who have flown in to eat and eat!

Dissolve one sachet of gelatin in warm water;
Pour all kinds of grains into the still warm solution;
Prepare regular cookie cutters, place string in them and fill with the resulting grain mixture;
Place the molds and contents in the refrigerator to thicken;
Delicious toys are ready, you can safely hang them on tree branches!

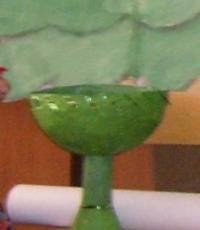
Another “quick” option is to get a few old cups, or take ordinary plastic cups, fill to the top with the prepared mixture (on any basis suggested). After the mixture has thickened in the refrigerator, tie the feeder to a tree branch with a ribbon! The quick option is no worse! 
An ordinary cardboard box can successfully serve as a bird canteen! However, it is advisable to select boxes covered with a special protective layer, laminate - this will significantly increase the service life of your feeder!

Juice boxes (they are covered both inside and outside with a special moisture-proof layer), small equipment boxes, medium-sized boxes from postal parcels, bright candy boxes. Even shoe boxes will do a great job as a feeder!
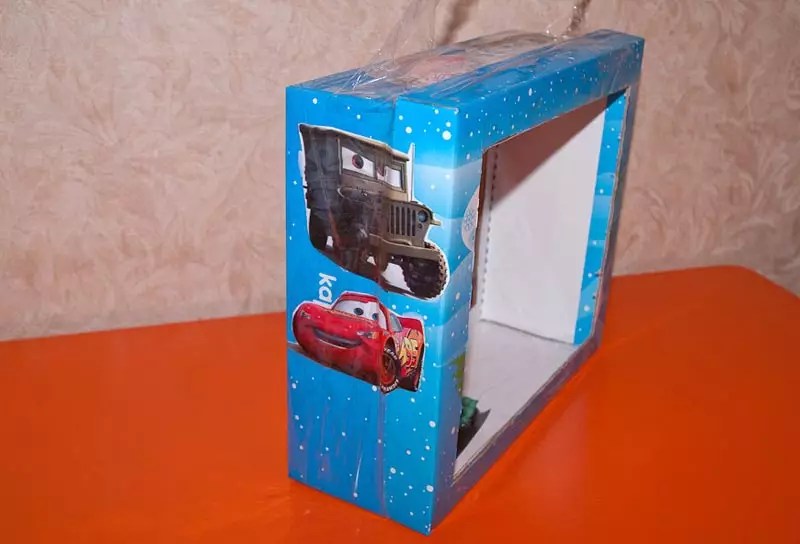
Candy box bird feeder
You will need:
Candy box (3 pcs.)
Two medium nylon twines or two shoelaces.
Place one edge of the box into the other so that you get a triangle of three interconnected candy boxes, as shown in the picture:
Thread a string through the roof of the feeder, and with the second string securely attach your feeder to the tree.

candy box feeder
The feeder is ready, all that remains is to pour in the delicious grains and crumbs!
Even a child can handle making such a feeder (by the way, don’t forget to involve the children in this entertaining activity).
You will need:
Juice or milk box;
Long lace;
Knife or scissors.
Take a box of a suitable size and, using scissors or a knife, carefully cut a hole in the side wall of the box.
Thread a string through the top edge of the box, right in the middle, and secure the “freshly prepared” feeder to the branch.

Hurry up and fill the birds with food - they have already discovered a new feeder and are waiting for your treat with all their might!
If you want to make a feeder large enough. To accommodate a whole flock of birds, take a regular postal parcel box! Carefully glue the top with tape, cut wide holes in the side walls, secure it to the tree - everything is ready! Look what happened:
This is where the soul can turn around! There are all kinds of plastic bottles all around. various forms and colors! There is a huge opportunity to show your creativity, invention, originality!
Let's take a closer look at the idea of turning an ordinary plastic water bottle into a bird feeder.
We will need:
- Knife or scissors;
- Plastic bottle with a capacity of 5-6 liters;
- Wire;
- Bird food.
1. Using a knife or sharp scissors, carefully (so as not to cut yourself) cut a wide hole in the plastic bottle, located slightly above the bottom of the bottle (2-3 cm will be enough);

2. You can make several windows, one on each side.
3. Wrap the neck of the bottle with a strong wire and secure the other end of the wire to a tree branch;
4. Place plywood or a piece of linoleum on the bottom of the feeder, with their help we will make our feeder heavier and it will not swing and turn over with every breeze;
5. Fill up with bird food and wait for the “guests” you have invited!
Feeder made from a plastic bottle with spoon stands
Let's say that you want to make a small, compact plastic feeder, then take plastic bottle by 1.5-2 liters!
You will need the following materials:
1.5-2 liter plastic bottle;
Wire;
Sharp knife or scissors;
Two wooden spoons for coasters;
Bird food.

Step-by-step instruction:
1. Take a plastic bottle with a capacity of 2 liters, measure 15 cm from the bottom of the bottle with a ruler and make a through hole for a wooden spoon at this height in the very center of the bottle;
2. Go even higher (approximately to the middle of the bottle) and make another through hole for the second spoon. Only at a different angle (perpendicular to the existing holes);
3. Insert spoons through the bottle;
4. Enlarge the hole on the wide side of the spoon - the grains will spill out and it will be convenient for the birds to peck them;
5. Pour the birdseed into the bottle;
6. Tie wire around the neck of the bottle and securely attach it to the branches of the tree.
The feeder is ready! In a few minutes, she will be visited by birds who want to treat themselves.
Another version of a plastic bottle feeder, more simplified:
We use the same materials as for the feeder with spoons. But now we don’t need spoons, but instead prepare duct tape.

So, in a two-liter bottle we cut a large hole at a height of 5-7 cm from the bottom of the bottle. To make it convenient for the birds to sit on the cut edges of the bottle, we cover the sections with electrical tape or tape (your choice). We wrap the wire around the neck of the bottle and screw it to a tree branch. Pour in the food - everything is ready!
DIY wooden bird feeder
We have already looked at quite a lot of different options for bird feeders, made from all kinds of available materials and even waste. It would be completely wrong if a reliable and durable wooden feeder is left without attention - these are the kind of feeders that hung on the trees in our childhood. These are what our Trudoviks taught us to make during labor lessons!

Let's recall the manufacturing technology and - let's get to work!
First, let's get a little creative and draw! Armed with a piece of paper and a pencil, draw the type of feeder you plan to make. Seeing it on paper. Estimate the size of the future bird “dining room”. Only after this can you start making the feeder.
As an option, use ready-made drawings, which are presented at the very beginning of this article. The dimensions are already indicated there, the contours are clearly outlined - you can safely move on to the next activities.
To make a wooden feeder you will definitely need the following tools:
1. Hacksaw;
2. Hammer;
3. Nails.
Prepare the following materials in advance:
Plywood the right size;
Bars 2x2 cm;
A thin wooden board for the base of the feeder.
We go strictly by size! Dimensions are shown in the drawing.
1. Cut out a rectangular base of the required size from a thin wooden board (solid);
2. Now we move on to the plywood sheet and cut out a rectangle of the same size as the base - this plywood sheet will serve as the roof of your feeder;
3. We cut the block into four parts, and one pair of bars should be 3 cm shorter than the first pair. Thanks to this design, water will flow smoothly over the roof of the feeder and will not stagnate on it - the roof will last much longer!
4. We retreat 1-1.5 cm from each edge of the feeder and nail the posts, first to the base of the feeder. And then we nail the roof to the posts. The front pillars should be shorter than the rear ones;
5. We nail a wire or a strong nylon cord to the middle of the roof and fix the feeder to the tree.
All! The work is done, pour in the food, and admire the merry bird feast! Don't forget to take photos - the memories will last a lifetime. There will be something to show your grandchildren and something to make with them!
Under no circumstances should we paint the feeder with paint or varnish - birds cannot tolerate such odors and will not visit a painted feeder with their presence!
What food is good for birds, and what food, on the contrary, can harm them?
Feeding birds is a rewarding activity, but it is worth knowing that not all food is suitable for birds to eat! One food can provoke illness in a gullible and hungry flyer, another can even lead to the death of the bird, but the third will definitely help the bird survive the cold and hungry press and live until the long-awaited spring!
So, what should not be given to birds as food:
- Crumbs from fresh white bread;
- Crumbs from rye bread;
Peels of bananas and all kinds of citrus fruits;
Cream pies, cakes;
Chips;
Roasted and salted sunflower seeds;
Cereals;
Nuts.
What you can and should treat birds with:
- Raw seeds;
- Buckwheat, millet, oats, millet;
- Crumbs and small pieces of stale white bread;
- Dried and cut into pieces fruits (dried fruits);
- Tits are very fond of small cubes of unsalted lard;
- For red-sided bullfinches, put rowan and viburnum in the feeder.
A few more photos of the original feeders:


Thanks to your attention and care in winter period there will be a real chance for more birds to survive, which in turn will definitely thank you later with their songs and “sanitary and health” work in your garden!
Watch also the video: Do-it-yourself bunker bird feeder in 10 minutes.
Feeders hung on the property of a private house are not only support for birds in the cold winter, but also a beautiful decoration for the yard. Of course, when you hear the word feeder, your memory brings to mind a nondescript wooden structure, completely different from a decorative element. However, you can make an original feeder that is both comfortable for birds and pleasing to the eye.
- The structure must perform its functions, and not just hang on a branch. Therefore, when creating it, you need to take into account several important nuances.
- Consider what birds live in your area.
- The structure must be suitable for the size of the animal. An excessively small feeder is inconvenient, but an excessively large one has its disadvantages. Other species of birds can take food from a large tit feeder.
- The food must be suitable.
- Place inside those types of food that are suitable for the birds that come to your garden. The food should be easy to get out; if the grains are large, the holes must be made large enough.
- When decorating the product, you should not use too bright colors.
- These animals see many more colors than humans. If the design is of overly saturated shades, the bird may avoid it, since it does not look like natural shades. It is better if its color imitates the plants that are usually seen on your site.
- The roof and sides are important for food safety.
- If snow and rain fall on it, mold may form that is dangerous to the health of the birds.
- The material of the product must be strong and moisture resistant.
- The better the material is selected, the longer the feeder will please the owners of the site and their feathered guests.
- For the safety of your little children, you should not leave sharp edges on the structure.
- The product should hang high so that birds do not become prey for cats.


Easy ways to make a feeder
Below are several options on how to easily make a bird feeder.
Coconut feeder
- This option is suitable for small animals.
- The contents are pulled out of the coconut, leaving only the shell.
- Make one or more holes in the sides of the shell.
- Attach a rope with which the structure will be attached to the branch.
- Add grain and the feeder is ready.

Mesh feeder for fruits
Supermarkets often sell tangerines or apples in nets. This item will be useful for creating a feeder. Difficulties arise with placing food in it. Regular grains fall out of the mesh easily.

It is better to place peanuts or peeled ones in such a mesh feeder. walnuts. It is advisable to place a roof made of a piece of plywood, board or plastic over the mesh.


Plastic construction
A bird feeder made from a plastic bottle is very easy to make. You just need to cut holes in the bottle and attach it to a branch, tying a wire to the neck. Using the same method, you can make a feeder from a cardboard juice or milk bag.


Wooden product
Small wooden sticks and boards are glued to each other with waterproof glue. The structure should have a bottom, sides at the edges, a roof and 4 vertical sticks holding the top and bottom together.

Vertical fastenings can be replaced with strong ropes. If you can’t fasten with glue, small screws or nails will do.

More complex designs
The ideas for decorative bird feeders are not much different from the simple options described above. Any of the listed methods is taken as a basis and decorated with elements suitable for accessories in the garden.

You can cut out and decorate elegant elements in the form of flowers or abstract decorations from plastic. Additional perches will look nice in a large wooden feeder.

To add functionality, you can attach a container with a small hole inside the structure. When the food runs out, the next portion of treats will pour out from the reserves.


Photos of bird feeders and visual instructions on how to improve them can inspire you to come up with some interesting ideas. There are many drawings on the Internet that indicate down to the centimeter the exact parameters for creating products with your own hands. For a creative person they will help you make a unique and useful decoration for your yard.


Photos of bird feeders


February 22nd, 2016
To make a bird feeder, you need to have a few simple items and tools. You can make a feeding trough with your children, but keep in mind that you need to watch every step, since during the construction process sharp things are used - scissors, knives, screwdrivers and even, sometimes, a saw. There are many options for feeders - made from plywood, plastic bottles, tin cans or cardboard.
Here are the most interesting, popular and original ideas creating a feeder:
Feeder made from scrap materials: toilet paper rolls
You will need:
1 toilet paper roll
Peanut butter
Small bowl
Plate
A couple of branches
Strong thread or fishing line
Knife (dull or plastic).
1. Connect two branches or sticks together using hot glue or string. You can skip this point if you make 4 holes in the sleeve (see below).
2. Make holes in the toilet paper roll so that you can thread two branches or sticks through them. It is better to make 2 holes: a little higher and 2 slightly lower (see image). This item is not required, because The sleeve can be put on differently.
3. Place the peanut butter in a small bowl and use a plastic knife to spread the butter onto the surface of the cardboard toilet paper roll.
4. Sprinkle the food over the peanut butter sleeve.
5. Repeat steps 3 and 4 for 4 more bushings.
6. Tie a strong thread to the connected branches so that the structure can be hung.
7. Hang all the cardboard tubes on the branch structure, and then hang everything on the tree.
Feeder made from a plastic bottle. Option 1.
You will need:
Any plastic bottle
Ribbon, thread or fishing line
Awl or drill (for making holes in the bottle and plastic cap)
Bolt and nut
Stationery or simple knife (if necessary)
Deep plastic plate.
1. Prepare a plastic bottle. Remove the label from it, wash it well and dry it.
2. Make a hole in the middle of the lid and plastic plate.
3. Attach the lid to the plate using a bolt and nut.
4. Make a hole in the bottom of the bottle (bottom).
5. Make several holes on the side (4-5), near the neck of the bottle, so that the food can spill out when you turn the bottle over. Holes can be made with a stationery knife if the bottle is not too dense.
6. Take the ribbon, fold it in half, and tie the ends in a knot. Thread the ribbon through the hole at the bottom of the bottle.
Now you can pour food into the bottle, screw on the cap and turn it over. The ribbon will allow you to hang the feeder on a branch.
Bird feeder made from a plastic bottle. Option 2.
You will need:
Plastic bottle
Plastic container
Strong thread or fishing line
Screwdriver or nail
Knife (simple or stationery).
1. Remove the cap from the bottle and the cap from the container.
2. Place the bottle cap on the container cap (in the center) and trace with a pen, felt-tip pen or pencil.
3. Using a utility knife, cut a hole in the lid of the container. The hole can be made slightly smaller than the diameter of the bottle cap.
4. Make one hole along the edges of the container lid.
5. Make a hole in the center of the bottle cap. The hole should be large enough to allow bird food to spill out.
6. Place the cap on the bottle and then insert the bottle into the hole in the container cap.
7. Tie a strong thread to the bottle and put the cap on the container.
Now you can pour food into the bottle or pour water and hang the feeder on a tree.
How to make a feeder from a box (photo instructions)
Original polymer clay feeder
You will need:
Polymer clay
Rope
Thick wire or piece of aluminum
Baking bowl or any other utensil that can be placed in the oven
A small piece of fabric.
1. First roll out the clay on a flat surface until it is about 6mm thick.
2. Carefully place the rolled out clay inside the baking bowl. Trim off any excess pieces so that the clay lies flat. Make 3 large holes in the clay for the rope.
3. Place the bowl of clay in the oven. Read the clay instructions carefully to know how long it takes for the clay to harden in the oven.
4. When the clay has hardened, carefully remove it from the bowl, tie three pieces of rope to it - tie a knot at one end of each rope, and insert the other end into the hole of the clay plate.
5. Tie all ends of the rope and secure them with wire.
6. It is advisable to place a small piece of fabric inside the plate so that the birds do not accidentally peck the clay along with the food.
Original do-it-yourself pumpkin feeder
You will need:
Small pumpkin
Wooden crossbars (even branches can be used)
Thin wire.
1. You need to cut off the top of the pumpkin.
2. Using a knife or screwdriver, make 4 holes in the pumpkin to insert branches or wooden slats into. Make 2 opposite holes at the same height and two other opposite ones slightly lower - this way you will have one branch slightly higher than the other.
3. Take a thin wire and wrap it around each end of the branches so that the feeder can be hung on the tree. Connect all the ends of the wire so that the feeder can hang evenly. Twist them into a hook.
Original DIY bird feeder idea
This feeder is suitable for sub-zero temperatures.
You will need:
Large plastic bottle
Small plastic bottle or small plastic container
Scissors
Coniferous branches
Berries (optional)
Seeds
1. Cut off the bottom of a large and small plastic bottle. First you can make a hole with a knife and then cut with scissors. You will have the base of the feeder.
2. Place spruce branches, berries and seeds in a circle in the cut-out bottom of a large bottle.
3. Place the bottom of a small bottle or small plastic container in the center of the base.
4. Pour earth, sand or pebbles into a small container.
5. Tie strong threads or fishing line to the feeder so it can be hung.
6. If you put the feeder in the freezer overnight, and then take out and remove the plastic parts, you will get an ice feeder.
How to make a feeder with your own hands using a bottle
You will need:
Small glass or plastic bottle (preferably with a cap)
Small saucer or bottom of a plastic bottle
Wire
Saw (if necessary)
Screw half ring (hook).
1. Using screws, connect two small pieces of plywood. IN in this example plywood dimensions 11 x 15 cm and 31 x 15 cm.
2. Using the bottle that you will later attach to the stand, mark the places where you will need to attach two pieces of wire - one at the neck, the other at the bottom of the bottle.
3. The neck of the bottle should be approximately 3-4 cm above the base.
4. Drill holes for the wire, insert your wire through the bottom, wrap it around the bottle and secure it to the back of the plywood (you can twist the wire or secure it with a stapler).
5. Fill the bottle with seeds, screw the lid on so as not to spill the seeds, turn it over and insert the bottle between the wires, place a saucer under it and remove the lid.
6. Screw a half-ring screw into the top of the plywood to hang the feeder.
Original DIY bird feeder
You will need:
Tin can (preferably with a lid)
Sisal rope (sisal rope) or thick rope
A piece of thin plywood, a branch, or any small metal piece
Hot glue.
1. If you have a jar with a lid, then the lid needs to be bent in half.
2. Take a small branch, piece of plywood, or other small piece that birds can perch on and glue it to the can.
3. Insert the bent lid as shown in the image (slightly inside the jar and over the metal part) and secure it with glue.
4. Take a thick rope or rope about 80 cm long and start wrapping the can so that the long ends of this rope (30 cm) remain at the beginning and at the end. Use glue to secure the rope to the can.
5. Cut the rope, tie the ends in a knot and secure with glue.
You will need:
3/4 cup birdseed
1/4 cup water
1 packet of gelatin
Twine or strong thread
Cookie pans
Baking paper.
1. Mix gelatin with water (1/4 cup) and bring to a boil, stirring. Make sure the gelatin is completely dissolved.
2. Remove from heat and let cool.
3. Add 3/4 cup birdseed. You can add more if it fits.
4. Place the cookie cutters on baking paper and fill them with the resulting food mixture.
5. Cut a piece of thread and tie its ends in a knot. Partially insert the thread into the mixture.
6. Leave the mixture to dry overnight, making sure to turn it occasionally when you have time.
7. Remove the molds and hang the food on the tree.
How to make your own bird feeder using tin cans
You will need:
3 cans of paint or cans
A piece of branch or wooden stick
Hot glue
Paints (if desired).
You can paint the jars, or you can leave them as is.
1. Glue a piece of branch to a jar for the birds to land and eat.
2. Wrap strong thread or ribbon around the jar and tie the ends in a knot. You can secure the tape with glue so that it sticks better to the jar.
3. Fill the jars with food and you're done!
How to make a bird feeder from a plastic bottle
You will need:
Plastic bottle (1.5 l or 5 l) or canister
Sharp scissors or utility knife
70 step by step photos and master classes will teach you how to make wooden bird feeders from logs and boards. You can make vertical ones to hang on a window or pole, as well as in the form of houses and gazebos.
Wooden bird feeders are quite durable. They look beautiful and will allow birds not to starve during the cold season.
Simple DIY wooden bird feeder

Depending on what materials you have, wooden feeders will be made.

To create one like this, take:
- round wooden rods;
- board;
- waterproof glue;
- nails;
- necessary equipment.
The feeder drawing will allow you to create it.

These dimensions are provided in inches. But knowing that there are 2.6 cm in one inch, you can create this product. First you will need to saw off a 20 cm long rectangle from the board. Drill holes, stepping back a little from the corners. These recesses will be at a distance of 2.5 cm from the edges. Sides will need to be attached to the base so that the food does not spill out. Make them from narrow boards. Place two on the edge and two on a wide surface.
Now you need to saw the wooden rod into pieces 24 cm long. Attach them to the previously created recesses. From above, these rods need to be fixed to the roof. It consists of two boards that are located at an angle of 90 degrees to each other. Tie a thick rope and use it to secure the wooden feeder at a height.
Sprinkle some treats for the birds, they will be happy to fly here.
Wooden bird feeder in the shape of a house

This one has an opening roof. But you can make it cohesive. First, make a bottom tray, which will also become the floor, and on it you will lay out treats for your feathered friends. To do this, attach 4 edges around the perimeter to the plywood.

Now take the bars and assemble two walls from them, as in the photo.

Attach these two sides to the base of the wooden feeder.

From above, fix the walls in this position using two small bars.

Taking a special or regular ruler, draw an angle on the board. Saw it off and attach such a gable to the top of the feeder, where the roof will be.

Determine where the hinges will be. Attach them to wooden boards.

Pre-drill holes in the gables to thread strong rope through, as shown in the photo.

Secure it so that similar wooden feeders hang securely on a hill.

To make such a cute birdhouse, take:
- processed wooden board width 14 cm;
- nails or screws;
- hook;
- rope;
- tools.
First, saw off 18 cm from the board. This rectangle will become the floor. You will need to attach 2 parts with pediments to it. To do this, you need to cut 2 boards 20 cm long and sharpen their upper parts at an angle of 45 degrees.
Fix these walls with gables on both sides of the floor. Additionally, secure with boards 13 cm wide. Make a gable roof from two rectangles of boards 20 cm long. The roof should protrude slightly beyond the wall so that precipitation does not penetrate inside and raindrops flow out. Use a hook to secure the rope from which you will hang such a beautiful wooden feeder in the shape of a house.
If you want the lid of this device to open, then attach these elements using hinges.

This bird house is attached using 2 hooks. You can make round windows on the sides to be able to observe the birds from all sides. The following diagram of the feeder will allow you to make it perfectly level. But the calculations are given in inches.

The dimensions for the following bird house are also given in inches.

Let's do a little math, you will multiply the presented numbers by 2.6 cm. For convenience, the result can be rounded. Then you will need to cut the boards from which you will make the base, two gable sides and two narrow walls. You will also need a couple of boards for the roof. Using fasteners, secure the rope, the edges of which are placed in the holes in the wall.

The following diagram of the feeder will allow you to arrange all the parts correctly and determine the size of this product.

- See also how to do
Wooden bird feeder with dispenser - step by step photos

This will allow you to always see how much food is inside. It will not get wet and will nourish the birds for a long time. Assemble a feeder that consists of a base and a roof. You need to attach rounded wooden rods to the base by inserting them into the recesses made. Then the birds will be able to sit on these perches and rest comfortably. Connect the roof elements together and attach them to two triangular gables. Make two holes at the top of 1 and 2 halves of the roof. The same ones need to be done at the bottom of the base.
Cut four rounded notches in the center. Take a jar with a tin screw cap. Make holes in the lid. Pour food into the container, screw on the lid and place it in the middle of the floor. When the supply of food in these recesses runs out, it will be automatically replenished from the jar, and the birds will not remain hungry.
You can place a plastic bottle inside a wooden feeder. To do this, you will need to make a recess in the roof, after pouring the food into the bottle, tighten the cap.

Beautiful wooden houses for birds - master class and photos
You will be able to see how much food is left and admire the birds without disturbing their peace.

Look at the diagram of a wooden feeder.

As you can see, the birdhouse consists of a base, two sides, a pair of side walls, a gable roof and a ridge for it. Sheets of transparent plastic are placed vertically on the sides. They need to be fixed so that there is a small gap at the bottom. Then you can pour food inside, and it will automatically pour out into the space accessible to the birds. But make the roof open so you can replenish food supplies for the birds through the top.
You can make this feeder with a dispenser to look like a cabin on the ocean. To do this, construct a roof from large and small branches.

Place large branches at the bottom so that birds can sit comfortably and take food from a plastic container.
- Read also,
Decorative elements for a wooden feeder
These are the words that can be used to describe other bird houses.

This wooden feeder doesn’t even require wood. After all, it is located on the counter. In addition to this bird canteen, there are two boxes in which you can plant greenery or flowers. Take a block of wood for the main post and secure its lower end in two perpendicular boards. To do this, you need to make a recess in the center of 1 and 2 boards and compare them. But first make through holes in the middle of each one the diameter of the bar. Now connect this lower part of the feeder using self-tapping screws. Look at how the roof is constructed.

As you can see, it is parallel to the feeder itself. To secure some of the elements of this bird canteen to wooden beam, you need to drill holes in them, as well as in the block. Place the edgings on the glue, inserting them into the holes made.

The elements that you will attach to the edges must be secured using clamps. Hold them until the glue dries.

Once the stand is done, all that remains is to paint it. Fill wooden boxes with soil and plant flowers there.
The next wooden feeder is fixed on a tripod, and the house is made in the form of an open gazebo. Down, food spills out onto the floor. Birds fly here and feast on it.

The next wooden feeder is also an item for decorating the area.

From two small planks, make a cross on which the timber will be attached.

Install it in the holes made and secure it with small oblique blocks.

Cut out 2 oval pieces and make 3 holes in one.

You can insert containers into the holes into which you will pour bird food.
Fasten together a solid oval part and with holes. Place food containers on top. They must have a mechanism that allows the birds to retrieve food.

If you know how to cut wood, then use a jigsaw to make shaped edges for the next structure. This will also be a wonderful decorative element.

Hanging wooden bird feeders
If you need to do it quickly wooden house for birds, then the following ideas will help.

For this you will need the following:
- four wooden planks;
- aluminum screen;
- nails;
- hammer;
- metal strips;
- wood glue;
- tools.
You need an aluminum screen in the shape of a square with sides of 25 cm. Take 4 planks and glue them together. Also additionally secure them at the corners with nails.

Use nails to attach the metal strips over the screen. They need to be placed end to end to form a box. Drill holes in the corners of this device where you will attach the hooks. Attach a chain to each using pliers, fix the upper ends on a large link, and then hang this device.
If you wish, make a similar feeder, but paint it white. This one looks especially beautiful against a green background.

To do this, you also need to knock together four boards, placing them on edge to form a box. You can use an aluminum screen or a sheet of plywood as the bottom. Secure any of these materials with self-tapping screws. Then attach beauty hooks to the sides so that the birds can rest here. Insert fasteners into the drilled holes and hang a chain to secure the feeder in an upright position.
And if several birds flock to you at once, then the next hanging feeder will do.

Use round plywood as a base. If you don't have one, cut one out of a square sheet or use a whole square one. Drill four holes on this tabletop so that the fixture will then hang level. Make 4 drawers from the boards or use ready-made ones. Attach a plastic bowl to the center. All that remains is to paint the tabletop, attach the rope and hang the device.

- see also
Do-it-yourself vertical bird feeders - master class and photos

These will save space and use vertical rather than horizontal space.
For such a device, take one and a half meters of boards 15 cm wide and a stainless wire mesh. First, saw the board so that you get 3 sides of 20 cm each. These will be the two lower side edges. The top one should be a little larger so that it protrudes from the right and left. Cut two rectangles of wire to size, insert each into grooves made in advance on the sides and bottom.

Attach a semicircle of wood to the bottom using nails and glue.

Drill holes at the top of the feeder and insert a bent brass rod here. It also needs to be secured to the upper sides of the product.

The following vertical bird feeder will allow them to rest and feast at the same time. These are especially loved by nuthatches and tits, which perfectly hold on to vertical supports.

Take:
- rectangle board measuring 25 by 23 cm;
- rounded perches;
- chain;
- hooks;
- tablet;
- wood glue
The prepared board needs to be sharpened at the top, then several indentations are made in it.

You will do them using a drill of the required diameter. Some holes should be the size of the poles. You will place them on glue and fix them in the recesses. Now you need to mix the birdseed with a small amount of peanut butter to make a viscous mass, and place this treat in the made recesses. Now you can enjoy watching how the titmice appreciate your efforts.

The next vertical feeder is attached directly to the wall or fence.

Take:
- wooden board;
- hot glue;
- nails with a hammer;
- plastic bowl;
- a wooden stick rounded on the sides.
First, it is better to cut out the parts on cardboard or paper in order to be able to compare them and make adjustments to these templates.
In the board that will be the floor, drill a hole in the side center to pour glue here and fix the wooden perch. Now knock down the roof elements, attach them to the wall, and attach the floor. You also need to glue the plastic container so that it does not get blown away by the wind and birds do not accidentally drop it. When the glue dries, it’s time to pour food inside the container and wait for guests.
This next vertical feeder is also quite nice. You need to use nails and glue to connect the gable roof to the walls, and them to the floor. Attach a treated rounded wooden board with holes in it at the back. Use these to hang a chain or rope to secure this bird canteen. You can draw or glue their images, then such wooden feeders will look even more interesting.

The vertical one can also be attached to the window using a suction cup. Then, while at home, you will be able to watch how the birds fly to you to feast on food.

To set up this bird canteen you will need these suction cups with fasteners. On the one hand, they will be fixed on the window, and on the other hand, you can fix them on a wooden plank using self-tapping screws. Knock down a wooden box. To do this, the floorboard must be level, and make a bevel at the top of each sidewall by sawing one board in this way.

Now you can attach the sloping roof on top; it will be located on a strip that is fixed to the two upper parts of the sidewalls. Cut holes here in advance to secure the two upper suction cups. Now you can fix the roof and attach the feeder to the window.

You can make it open. To do this, knock down a box, make a bottom out of plywood or aluminum sheet or plastic mesh. Fix this device on two vertical bars. Attach suction cups to it, or you can fix hooks on top and hang it on the window.

You can also attach a horizontal feeder near the window, securing it with chains. To ensure that the birds have a varied menu, stuff slats between the parts of the bottom to separate the dishes.

And if you use transparent plastic, then you will pour food between its two sheets, make a hole at the bottom so that the food pours out here in doses. Then you can watch the birds, and they watch you.

The next wooden feeder, made with your own hands, is also very interesting. The side bars and walls are attached using metal corners. This feeder is attached to the wall using special fasteners. Its walls are plastic, they are not closed on the sides, so that food can be poured through these holes, and the birds can flock to the treat.

You can fix the next bird feeder on a wooden window frame from the outside or on a block placed vertically.

First you will need to cut 8 boards of the same size. Make an octagon out of them by attaching them as follows.

Attach one board from one opposite side to the other, attach two more perpendicular to it, so that you get a cross like this inside. Attach the bottom using wooden sticks or plywood. Take a strong narrow board and attach two wooden fragments cut at an angle to its ends. Using one you will attach this leg to the bottom of the feeder, and the second will help secure this bird's dining room to a vertical wooden support.

DIY log bird feeder - step by step photos
Such wooden feeders also look very interesting and will be useful for birds.

This bird's canteen looks natural. It seems as if the titmouse is simply jumping on a log in search of food, but in fact the product was made from a log.

To do this, you need to cut off an element of the required size from the log, hollow out the wood inside, leaving impressive side walls. Attach hooks at the top and bottom for fastening. Now you need to put food here, but regular food will spill out, so do it as follows. Take coconut or peanut butter and melt it on low heat. Then mix the peanuts with other grains. Place the resulting food into the hole of the log, press with a spoon so that the treat fits tightly into the container.

Now pour a small amount of prepared melted butter on top and let the structure harden. When this happens, use hooks to hang this wooden feeder in place.

The birds will surely appreciate your efforts. If you have small logs or twigs, use them to make a roof for your next feeder.

To do this, you need to saw the logs in half lengthwise and make a roof out of them, attaching them on the back side at the top and bottom along the plank. Fix 2 planks on the created base, they will become vertical walls. Attach the structure to a log dug vertically into the ground.
If you do not have suitable boards, but only thick branches or thin logs, then make the basis for a bird's dining room from them.

Attach a sheet of iron or polycarbonate on top, and at the bottom attach this structure to a rectangle of plywood.
If there is a log, then use special tools to remove the middle from it, place this structure on its side and hang it. You will get a wonderful house for birds, into which you will pour food for them.

The next one is also quite easy to do. If you do not have oval blanks, then you can cut the handle from a rake or shovel, and also take bars.
- Article