1s selection of the default workplace. The procedure for setting up user rights for working in the cashier workplace mode of the “1C:Pharmacy for Kazakhstan” configuration. Setting up additional user rights
Cashier Workplace Settings
When using the RMK mode, it is possible to change user rights without exiting the program. For example, to design a recess Money The senior cashier only needs to read the code of his service card to activate the withdrawal function. Limitation functionality The cashier's status when working in RMK is determined by a combination of general settings of the RMK interface and personal additional user rights.
The program provides two pre-made RMK settings: for a grocery store and a non-food store. However, the system administrator can create the required number of settings that take into account the specifics of different stores.
The RMK interface settings are located on three pages: General settings,Fast goods And Bottom panel settings.
General RMK settings control the behavior of the program during registration retail sales generally. For example, general settings determine the ability to enter an arbitrary price value if the sale price has not been assigned, printing documents when returning, conducting a customer survey, as well as the behavior of some forms.
On the page Fast goods You can configure hotkeys for products that are sold quite often, but do not have an industrial barcode. You can display an image of the product on the buttons on the quick product panel in the RMK.
Setting up the bottom panel consists of selecting the commands required for operation from a list of 26 preset commands. Commands for registering personal sales and replacing user rights, withdrawing and depositing funds, managing pending checks and reversing a check, working with discount cards and discounts, managing equipment connected to the cash register and printing documents are supported.
The user's personal settings determine access to configured operations in the RMK. The cashier can be given the opportunity to edit the fields of the tabular part of the check, register discount cards and conduct a survey, process returns, establish control over balances when issuing a check, and also be given the opportunity to use functions defined by the general settings of the cash register. Commands that are not available to an ordinary cashier are displayed on the screen, but become inactive.
The program implements the ability to set the procedure for rounding the amount of a check in favor of a buyer in a specific store. You can also assign a type of minimum selling prices. When automatically calculating discounts, the system will replace the discounted price with the lowest possible price if the discount is too large.
A large number of settings allow you to fine-tune the program at the checkout point, take into account the specific distribution of responsibilities of store employees and process sales at the highest possible speed.
First you need to create in the 1C database retail store, then connect the retail equipment and only then configure the RMK.
To create a store in 1C, go to the section Reference data and Administration, Further Warehouses and shops and create Retail store.

In the window that opens, fill in the empty fields.

To this store connect the cash register, you need to create it in the section Reference data and Administration → Cash register cash register. We will use the fiscal registrar cash register type, so we select it. You choose the type that you will use in your store. We also indicate our warehouse - the Electrical Goods Store.

For our store we now need to connect commercial equipment. You can configure it using a special processing called “Connecting and setting up maintenance”. Go to the section Reference data and Administration → RMC and equipment. Check the box next to "Use connected equipment" and then open the hyperlink "Connected equipment". In the window that opens, you need to create and configure the necessary retail equipment.


Now we can move on to setting up the cashier’s workplace itself. To do this, open the section Reference data and Administration → RMK and equipment → RMK settings.

In the window that opens, you must specify the cash register cash register and the connected equipment. You can also configure quick products and hot keys.

Before you start registering retail sales, you need to open a cash register shift. To do this, go to the section Sales → Cash register receipts → Opening a cash register shift.


Let's create a new check. Select a product from the product list and indicate its quantity. The price will be filled in automatically from the document Setting item prices. Next we move on to payment. The client can pay in cash if you have an acquiring terminal connected - from a card, or in both ways at the same time. Choose the right way payment and punch the check.
You can close a shift from the list of KKM receipts or on the RMK.

After closing a cash register shift, all receipts issued for the shift can be deleted, archived or left unchanged. When you click the Close Shift button, a Retail Sales Report is automatically generated.
A user enters for whom the role of a cash register cash register operator (RMK) is defined, and he is shown the following menu:
- Sales registration - transition to the sales registration subsystem, where all operations for the sale and return of goods are carried out.
- Report without cancellation - creating an X-report (displaying a list of sales receipts) for the current moment without closing the shift.
- Closing a shift - automatically generates a report on retail sales at the end of a cash register shift and generates a Z-report. Moreover, information about all punched receipts is saved and can be used to analyze sales and returns of goods during a cash register shift.
- Summary report - generation of a summary report for the store, for all previously generated “Retail Sales Report” documents.
- Setting up cash register - by selecting this menu item, you can configure the cash register, hot keys, access rights and other functions for the cashier’s work.
- Close—exits the cashier’s workplace menu to the store manager’s work mode.
- Shutdown - shutdown the cashier and exit the program.
Menu items at the cashier's workplace can be configured:
Service - Users - Setting up additional user rights.

The program provides different variants payments from buyers for goods: cash payment, payment by payment cards or payment through a bank loan. The last two options are optional and are defined in the accounting settings on the Acquiring tab.

1. Setting up a cashier's workplace
In this section, you can create and save RMK settings that will be used in the future by a specific user or group of users. This information is stored in a separate directory. To add a new setting, click Ins or select the corresponding icon on the toolbar.

Let's look at the tabs for setting up the RMK: General settings, Interface and Quick products.
General settings
- The Merge items with the same product checkbox should be selected if it is necessary for the information in the receipt about the same type of product to be printed in one line.
- Selected flag Assign a price to goods with at zero cost means that the price can be edited by the cashier if they are preset.
- The When returning, print a package of documents flag will allow the cashier to print a package of documents when processing returns: a statement from the buyer (or cashier) about the reason for the return, a return certificate, a cash receipt order.
- The presence of the Check balances of goods when closing a check flag indicates control of balances of goods when posting the KKM Receipt document.
- The selected flag Selecting an information card only by code indicates that the employee is identified by the code of his information card, and the general list information cards All employees are not shown to the cashier.
- The Round discount percentage up checkbox allows you to round up or down.
- It is possible to automatically save the current receipt to an external file. To do this, you need to specify a time interval for autosaving. This will ensure quick restoration of the cashier’s work in case of unforeseen circumstances (for example, in the event of a power failure).
Interface

In the workplace settings, the cashier has the opportunity to choose one of two modes:
- Using both a keyboard and a mouse, it is most often used in stores selling non-food products. To do this, select the Display text selection checkbox on the right side of the screen. The user sees a standard product selection dialog box.
- Using a programmable keyboard (without using a mouse), used in food stores. In this mode, the Show keyboard on the right side of the screen flag is selected. The cashier sees buttons from the touch screen or keyboard on the right side of the screen. The interface is adapted for streaming scanning of goods. In this mode, it is necessary to configure service functions for the selection of goods (closing the selection when selecting a product, defining the default search field - code, article or barcode of the product).
Fast goods

If there are products that are sold quite often, you can make a quick selection button (product button) and a key combination (accelerator), pressing which will allow you to quickly select the desired product.
2. Sales registration
There are two options for RMK settings:
- non-food retail (using keyboard and mouse)
- food retail (use of a programmable keyboard, streaming mode of working with customers)
Let's consider the first option (non-food retail).

At the top of the screen information about the current sale is provided: discount amount, total amount taking into account the discount, the amount to be paid taking into account the discount.
The main window informs about the products being sold, namely, their product range, quantity of goods, price, discount type and discount percentage, discounted amount.
The ability to quickly enter from the keyboard using hot keys has been implemented.
There are hint buttons at the bottom of the screen.
- Lower panel (ALT+/). When you click this button, the control buttons in the bottom panel of the dialog box are shown/hidden.
- Right panel (/). A panel is shown on the right with the function of manually selecting products into a document. Moreover, the search can be carried out by article number, code or barcode of the product.
- Return (*). Refunds will be made on the same day before the checkout closes.
- Sales receipt (-). Reflection of the sales receipt on the screen with the possibility of its subsequent printing, which is allowed even before the receipt itself is punched.
- Payment (+). Entering payment information and punching a receipt through the cash register.
- Fast goods (F2). This button allows you to display a list of quick products that were previously specified when setting up the RMK.
- Depositing money (F3). This button reflects the function of depositing money into the cash register. This is convenient to use when depositing change at the beginning of a shift.
- Withdrawal of money (F4). The function allows you to reflect the withdrawal of money from the cash register, for example, in the case of collection.
- Est. % per check (F5). The cashier uses this button if it is necessary to set a discount, percentage or total.
- Cancel % on check (F6). This button is used to cancel established discount before breaking the check.
- Barcode (F7). When you press the button, a request for the barcode of the product appears.
- Inform. map (F8). Clicking this button opens a separate dialog box in which you can select a discount card for sale.
- Canceled. check (F9). Button for removing product items from the sales window (clearing the window).
- Manager mode (F11). Allows you to change the RMK to the manager operating mode for those users for whom the possibility of such a switch is configured.
- Get weight (Alt + F2). Subject to connection electronic scales in Online mode, the button will allow you to get the weight of the product automatically.
- Seller (Alt + F3). When registering personal sales of sellers, this button allows you to select a seller from the list of employees.
- Replace permissions (Alt + F4). When the cashier's work requires administrator intervention (cancelling a check, processing a return of goods), use this button. After clicking the button, you must enter the code in the additional window registration card employee.
- Est. % on product (Alt + F5). If you need to apply for a percentage or total discount on a specific product, use this button.
- Cancel % on product (Alt + F6). This button is used to cancel the established discount on a specific product.
- Postpone check (Alt + F7). The button allows you to postpone receipt generation.
- Cont. check (Alt + F8). Continue generating the deferred check.
- Customer return (F10). Allows you to issue a refund after the cash register shift is closed.
- Exit (F12). Exit to the main cashier menu.
To sell, you must first scan the product, or add it manually using the selection button, after which the corresponding item will appear. If there is a discount, set it and click the Payment button.
Let's consider the second option - food retail (using a programmable keyboard)
In this mode, data is entered only from the keyboard, without using the mouse. The right side of the screen contains information about buttons for quick input from a programmable keyboard or computer keyboard. Each button that is responsible for certain actions, correspond to hot keys on the keyboard.

- Numbers and comma - enter numbers. Numbers when pressing buttons from a programmable keyboard or numeric keypad are displayed in the upper right corner under the Keys, Return, Commodity buttons. check, payment.
- Quantity (K) — set the quantity for a specific product (for the active row of the tabular part of the receipt).
- Price (P) - set the price for a specific product (according to the active line of the tabular part of the receipt).
- Reversal (D)—delete the active row in the tabular part of the check.
- Selection (F) - opens the selection function with filtering of the displayed data specified in the RMK settings.
- C (Bakcsp.) - clear entered numbers from the keyboard.
Hotkey functions are configured on the salesperson's programmable keyboard.
To turn off the display of buttons, you can use the Right panel button (/).
If the Close selection when selecting a product checkbox is not selected in the RMK settings, then when you press the Selection (F) button (or accelerator), the selection opens in the lower part of the screen, the size of half the tabular part of the receipt.
If the Close selection when selecting a product checkbox is selected in the RMK settings, then the selection visibility replaces the tabular part of the receipt. After selecting a position in the selection, the tabular part of the receipt is activated, and the selection is closed. In the selection, you can display the balances and prices of goods from the store of the current cash register.
The control keys are the same as those described earlier when working in non-food retail mode (Return, Sales receipt, Payment, Canceled receipt, etc.).
Reprinting and other full or partial reproduction and reproduction of site materials/articles (as well as their copying on other Internet resources) is not permitted.
The procedure for setting up user rights for working in the cashier workplace mode of the “1C:Pharmacy for Kazakhstan” configuration
Date of publication: 06/30/2014
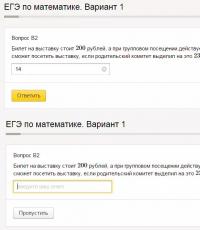
This article will tell you how to correctly set up user rights to perform cash transactions in the configuration " 1C:Pharmacy for Kazakhstan" In addition, the settings for the cashier's workplace interface will be discussed.
Before you follow the steps in this article, you must set up administrator rights. This item is described in the article “”.
So, let's start by creating a user with the role "Cashier". To do this, go to the “1C: Pharmacy for Kazakhstan” system configurator mode and go to the “Administration” menu — "Users", select the "Add" command. In the window that appears, fill in the details “Name” and “Full name”, as shown in the following figure.
In order for the created user to be displayed in the selection list of the authorization window, you must set the “Show in selection list” checkbox.
Here you can assign a password for the user to enter the configuration. You can not set a password for the user to enter the program, but use the one that is entered when logging into Windows. In this case, you must set the “Operating system authentication” flag and select a user from the list of registered users. To authorize a user using OpenID, set the “OpenID Authentication” flag. In this case, the user is authorized not in the infobase, but using an external OpenID provider, which stores a list of users.

The most optimal interface for the RMK role is “General”, since this interface contains a menu with which you can go to the objects necessary for sales.
When the “RMK” role is installed for the user, then at startup information base The cashier's workplace menu will automatically open.

Setting up additional user rights
Now launch 1C:Enterprise mode under a user with administrator rights. Select "Service" — "Users" — "Setting up additional user rights." In the settings form that opens, select the user for whom you want to configure additional rights.

In the “Setting up additional rights” form, rights are specified for a specific user. In the “Cashier Workplace Management” group, user rights are configured when working in the RMK mode. In order to set personal settings for the RMK mode, go to the “RMK Interface” item.

Let's consider the purpose of each flag in the “RMK Interface” item for setting up additional rights.
- "Allow check cancellation" — if the flag is set, the “Canceling a check” command will be available to the user working with the cashier interface.
- “Allow depositing money” and “Allow withdrawing money” — if the flags are set, the user will have access to the “Deposit money” and “Withdraw money” commands. The “Deposit Money” command is intended for depositing change funds at the beginning of the shift. The “Withdraw money” command withdraws funds from the cash register, for example, during collection.
- “Allow assignment of manual discounts” - if the flag is checked, the user has the opportunity to enter the amount of an absolute discount, the percentage of a relative discount on a product line or on the document amount. The “Set” commands are available in the RMK interface. % on check" and "Set. % on the product." Detailed description These commands are given in the article "".
- “Allow selection of information card” - if the flag is checked, the “Information card” command will be available. When you click this button, a separate dialog box will appear in which you can manually select a discount card and set a discount for sale.
- “Allow working with deferred receipts” - if the flag is checked, the “Postpone current” commands will be available. check" and "Cont. check". The user will be able to postpone working with the current receipt and return to it later.
- “Allow editing of a typed receipt” - when this flag is checked, the user will be able to edit the current receipt.
- “Allow product reversal” - if this flag is not set, then when adding a product in RMK mode, the user will not be able to delete the current line.
- “Allow return receipt”—if the flag is checked, the user will be able to issue a return receipt.
The next thing that needs to be configured for the user is the type of RMK menu.

If not a single item is specified in the list of “RMK Menu”, then only one command “Sales Registration” will be available to the user.

Let's look at what each “RMK Menu” setting flag is intended for.
If it is necessary for the user to be able to close the configuration independently, then it is necessary to set the flag “Allow exit to operating system" The “Shutdown” command will be available in the RMK menu.

If the cashier will independently close the cash register shift at the end of the day, then set the “Allow closing shift” flag. When closing a shift, a retail sales report is automatically generated and a “Z-report” is generated. The “Close shift” command will be available in the RMK menu.

If the user is allowed to change the current RMK setting (hot keys in the RMK, access rights, setting commercial equipment and other functions for the cashier’s work), then set the “Allow RMK configuration” flag. The “RMK Setup” command will be available in the RMK menu.

To be able to generate an “X-report”, i.e. displaying a list of sales receipts at the current moment without closing the shift, set the flag “Allow shift reporting without cancellation”. The “Report without blanking” command will be available in the RMK menu.

To generate a summary report for the store (for all previously generated “Retail Sales Report” documents), check the “Allow generation of a summary report for cash register shift” checkbox. The “Summary Report” command will be available in the RMK menu.

Setting the “Allow interface switching” flag will allow the user to work with several program interfaces, independently selecting the interface he needs. The “Close” command will be available in the RMK menu.

To enable user rights, click the “OK” button.

Setting up a cashier's workplace
After setting up additional user rights, let's move on to setting up the RMK (menu "Service" — "RMK Settings").

Initially, the RMK settings are located on three tabs:
- General settings
- Interface
- Fast goods
The “Bottom panel” tab is displayed if the “Use advanced bottom panel settings” flag is selected. On the bottom panel there are additional RMK commands, for example, “Quick goods”, “Continue”. check", "Canceled. check”, etc.

“General settings” tab
Let's look at the settings on the “General Settings” tab.
If the “Combine items with the same product” flag is set, then when adding a product of the same type, its quantity will change. If the flag is not set, then information about each product in the receipt will be printed on a separate line.

If the flag “Assign a price to goods with a zero price” is set, then the cashier can edit prices for goods if prices are not set by the store (when accounting for quantitative balances).
Setting the flag “When returning, print a package of documents” will allow the cashier to print Required documents, accompanying the return of goods: a statement from the buyer (or cashier) about the reason for the return, a return certificate, a cash receipt order.
Setting the flag “Control product balances when closing a receipt” allows you to control product balances at the time of posting the “KKM Receipt” document.
Setting the “Select information card only by code” flag blocks the cashier’s access to the general list of employee information cards. An employee is identified by entering the code of his information card without showing the cashier a general list of information cards of all employees.
Setting the “Carry out a survey” flag activates the functionality of registering the buyer’s personal data and discount card when making a purchase, including in RMK. To enter personal data in RMK mode, you need to configure additional rights for the cashier (“Additional user rights” — set the flags “Carry out a survey when preparing documents” and “Allow registration of a discount card when reading a new code”).
Specifying the autosave interval for the current receipt will allow you to automatically save information about the current receipt to an external file. This will ensure quick restoration of the cashier’s work, for example, in the event of a power failure.
If the checkbox “Check for availability of dismantled items before express disassembly” is checked, the system will check the remaining components before carrying out disassembly.
The flag “Fill the tabular part with product series” - turns on the mechanism for automatically selecting product series into a document in the RMK mode. Before filling out the document, batches of items are sorted in ascending order of expiration date (with quantitative accounting of balances).
Tab "Interface"
Let's consider the features when setting up the interface of the cashier's workplace. The interface of the cashier's workstation (WWK) is configured on the "Interface" tab.

In the workplace settings, the cashier is offered a choice of two options: “Display text selection on the right side of the screen” and “Display the keyboard on the right side of the screen.”
If the “Display text selection on the right side of the screen” flag is set, then the user has access to interface settings using the standard product selection dialog box. Work in RMK is carried out using a keyboard and mouse, with the ability to select products based on text representation.

For this mode, service functions for selecting goods are configured (selection of items based on balances, selection of additional units of measurement).

If the flag “Show items in the selection by balances” is checked, then the selection will only include those items for which there is a balance in the warehouse.
If the flag “Show the form for selecting additional units of measurement (at average price)” is checked, then when you select an item that has multiple units of measurement, the “Select Item” dialog box will appear.

If the “Display keyboard on the right side of the screen” flag is set, then the RMK with a programmable keyboard is used for operation.

On the right side of the cashier's workplace, buttons are displayed for convenient pressing from the TouchScreen or from the keyboard. For this operating mode of the RMK, service functions for the selection of goods are configured (closing the selection when selecting a product, defining the default search field (code, article or barcode of the product)).

If the “Close selection when selecting a product” flag is set, then when selecting an item, the selection window will close automatically.

When the flag “Select products when switching to selection mode” is set in the RMK setting (if any value is entered in the text field), filtering of the displayed data in the selection is carried out by the area specified in the RMK settings (Code, Barcode, Article).
If the “Open right panel at startup” and “Open bottom panel at startup” flags are set, then when you open the RMK, the bottom and right panels will open automatically.
Tab "Quick Products"
The list of quick products is configured on the “Quick Products” tab.
For products that are sold quite often, you can assign a quick selection button (product button) and a key combination (accelerator), when pressed, the product will be selected from the list.

To open the panel with quick products in RMK mode, you must press the “Quick products (F2)” button.

The commands in the bottom panel can be filled in either by default or edited manually. The user can change the list of commands, assign function keys, and change the location.
When reading the previous article Managed command interface of the 1C Accounting program 8th ed. 3.0 - the first acquaintance, you probably noticed that we never talked about special interfaces for this or that user. They didn’t say it because they simply aren’t in the 1C Accounting 8 edition 3.0 program.
Most likely, this will surprise users of the 1C Accounting 8 edition 2.0 program. After all, it has such interfaces.
- Accounting.
- Personal income tax of an entrepreneur.
- Administrative.
- Full.
This is true. So what? What did these interfaces give us? Let's say that in the accounting department there are two more accountants in addition to the chief accountant. One deals only with banking and cash transactions, while the other keeps records of fixed assets. In this case, it was necessary to invite a programmer to develop specialized interfaces for each of these users. Only a specialist who knows the configuration well can create and correctly describe new roles and rights. Of course, such changes are only possible if the configuration is removed from support.
On the contrary, in the 1C Accounting program 8th ed. 3.0, the user can independently or with the help of a more trained colleague create the command interface necessary for his work. Let's look at some examples of how this is done.
1. The command interface is a managed 1C interface
Command interface in the 1C Accounting program 8 ed. 3.0 is a managed interface. This means that the user can independently manage it directly in 1C Enterprise mode. Yes, it is the user, and not just the programmer in the Configurator mode.
To do this, on the system command panel, in the main menu there is a “View” item, which provides access to commands for editing managed interface panels.
Only two commands require explanation.
- Section panel. Enables or disables the display of the partition panel on the command interface.
- Navigation and Action Bar. Enables or disables the display of the navigation bar and action bar on the command interface.
2. Create an interface for the calculator
We'll look at creating and configuring the interface at simple example. Let’s say that our user needs only two sections to work: “Bank and cash desk” and “Employees and salary”. You can delete unnecessary sections in the form, which can be called up using the command “INFORMATION PANEL\Main Menu\View\Setting the Section Panel”.

Using the “Delete” button, delete sections that our user does not need. Leave only “Bank and cash desk” and “Employees and salaries”. After saving the changes (OK button), we get the following interface.

Pay attention to the “Show” attribute in the “Setting the section panel” form. It allows you to display sections not only as images with text. For example, they can be reflected only with text, as in the figure.

This feature can be very useful for those users who work with small screens.
3. Set up the interface for the cashier
Let's set up an interface for a cashier who deals only with cash transactions. We will assume that the administrator has already created the “Cashier” user and granted him the appropriate rights.
First, let us note one important feature that must be taken into account when creating your own interfaces.
Whenever you start a program again, it always automatically opens in the “Desktop” section.
You can completely disable the section panel display mode or leave only one section in it, for example, “Bank and cash desk”. Or you could complete the work, for example, in the "Purchases and Sales" section. Doesn't matter. Whenever you start the program again, the “Desktop” is always updated. It cannot be removed.
So if we only need one partition accounting, for example, “Bank and cash desk”, then it will not be possible to display only it on the section panel. The “Desktop” section will also be displayed along with it. In our case, this is showing links that the cashier does not need.
Let's proceed as follows. Activate "Desktop". Notice that there is a command link for “Cash Documents” in its navigation bar. Let's edit the navigation and action bars for the Desktop section.

To edit the navigation bar, run the command “INFORMATION PANEL\Main Menu\View\Customize Navigation Pane”.

By manipulating the “Add”, “Add All”, “Delete” and “Delete All” buttons, leave only the “Cash Documents” navigation command in the right window.

Now let's edit the action bar of the desktop section. To do this, run the command “INFORMATION PANEL\Main Menu\View\Customize Action Bar”.

When manipulating the Add, Add All, Remove, and Remove All buttons, leave only the commands outlined in red rectangles in the right window.
We assumed that our organization is not engaged in retail sales. Therefore, the cashier does not need the “Retail Sales Report” document. We also assumed that the cashier does not need standard accounting reports. Therefore, we also removed them from the action bar.
Using the command “INFORMATION PANEL\Main Menu\View\Section Bar”, disable the display of the section bar. Quit the program and reopen it as a cashier. This is what its interface will look like.

Nothing extra! Only the documents necessary for the cashier and two reports. If necessary, he can open a list of cash documents by clicking on the “Cash Documents” navigation command. It is located on the navigation bar.
4. Interface of the 1C Accounting 7.7 program
1C developers are well aware that no matter how good the new interface is, many of us live by the principle: the best is the enemy of the good. So, when switching from the 1C Accounting 7.7 program, you can often hear. I don’t understand anything about the new interface, I don’t have time to figure it out, I have urgent work.
Such users can install 8th edition in their 1C:Accounting program in a few clicks. 3.0 is the seven interface that he loved so much. It looks as shown in the picture.

Externally, of course, it differs from the original seven interface. But structurally everything is the same.
You can enable the seven interface only if the “Bookmarks” mode is set in the program for opening object forms. It is installed in the “Options” form, which is called by the command “System Command Panel\Main Menu\Tools\Options”.

Then, in the section panel, activate the “Administration” section and click the “Program Settings” link in the action bar.

In the “Program Settings” form that opens in the work area, go to the “Interface” tab and activate the radio button “Interface similar to 1C: Accounting 7.7”.

All. Save the result by clicking OK. Work with the seven interface you are familiar with. At the same time, do not forget to take the time to master the original interface in the demo database. When you get used to the native interface of the 1C: Accounting 8th ed. 3.0, then you can restore it very quickly.
To do this, on the section panel, click on the “Service” link. In the navigation panel, click the “Program Settings” link. Activate the “Interface” tab and specify “Standard interface 1C: Accounting 8”. And, of course, OK.

6. Managing object shapes
Program 1C Accounting 8 ed. 3.0 provides the user with more than just the ability to control the command interface. It can also control the shapes of individual objects. These are forms of journals (lists) of documents, forms of the documents themselves and reference books. To manage these forms, there is an “All Actions” button in the upper right corner of a form opened in the workspace. And there is a command “Change shape”.
Of course, the programmer has more options when creating object forms. Nevertheless, let's look at one simple example.
Initially, the form of the document “Invoice for payment to customers” looks as shown in the figure.

Now let’s assume that our organization is engaged only in providing services. Therefore, we do not need the “Warehouse” and “Delivery Address” details. In the tabular part, we also do not need the “Products” and “Returnable items” bookmarks. To get rid of them, click on the “All actions” button and select “Change form”.

If the branch we need is not opened, then click on the cross. It's in the circle to the left of the branch. Then remove the flags from those details and pages that we do not need.
In the same way, you can modify the command panel of the documents form. Let's make the following changes. First, expand the “Command Panel” branch.
- "Swipe close" button. Now it only displays text. In the “Form Settings” form, on the “Command Panel” branch, select the “Post and Close” branch. In the window on the right, assign the “Display” attribute to the value “Picture and text”.
- “Record” and “Subordination Structure” buttons. For these buttons, also assign the “Display” attribute to “Picture and text”.
- Frame around hats. For beauty and clarity, the left and right headers can be outlined with a frame.
Ultimately, we will get the following form for the document “Invoice for payment to the buyer”.

For cautious users, I would like to note the following.
Attention. Don't be afraid to experiment with object shape settings. They do not change the accounting contents of the infobase.
Of course, it is better to train at a demonstration base. But, if you didn’t like something in the working database when setting up a form, then there is no need to consistently restore the original state of the form.
To do this, on the object form, execute the command “All actions \ Change form”. The already known “Form Settings” will open. In it, execute the command “All actions \ Set standard settings”.
7. Reporting errors
Program 1C Accounting 8 ed. 3.0 controls the completion of mandatory details. However, previous editions did this too. But unlike previous editions, diagnostic messages of 1C Accounting 8 edition 3.0 have become more informative. They show which details contain errors and which ones.
For example, novice users often make this mistake. They try to fill out document details not by selecting them from relevant directories, but by manually entering the required values. The figure shows that the user manually entered Zarya LLC in the “Counterparty” attribute. Such a counterparty is the 1C Accounting program ed. I didn’t find 2.0 in the “Counterparties” directory. Therefore, when writing the document, she reported an error as shown in the figure.

But, if the user has not been trained, if he does not know that most of the details are filled out by selection from the relevant directories, then such a message will cause him nothing but bewilderment.
And here is how the 1C Accounting ed. program reacts to the same error. 3.0.

Here the program doesn’t just say that the entered value is incorrect. It will tell you that the value was not found. It’s easy to guess where it’s not found if you click on the “Select from list” button.
In forms with a lot of required details, there is always a chance that some of them will be missed. In this case, the program will also display informative messages. At the same time, it will show where you forgot to fill in the details.

There are two ways to move from error to error. Either by using the navigation arrows in the diagnostic message or by clicking on the links in the message bar.
That's probably all. I hope that the managed command interface of the 1C Accounting program 8th ed. 3.0 will not be a stumbling block when mastering this program. It is indeed more convenient, but you need to spend a little of your precious time to master it.