Make color correction of a photo. Selective color correction in Photoshop. Coloring a photo using curves
In this tutorial we'll show you how to apply selective color correction to a photo, or more precisely, how to convert an image to black and white, but still leave the selected element in color.
And although this effect is extremely easy to achieve in Photoshop program, many are wary of it because they are not always sure that they are choosing the right tools. Most often, people resort to selection tools, and then there are often hiccups. In this tutorial we'll show you how to create this effect without using selection tools. All we need is a simple Black & White adjustment layer, a layer mask and a brush, nothing more!
I'll be working in Photoshop CC, but this tutorial is also compatible with Photoshop CS6.
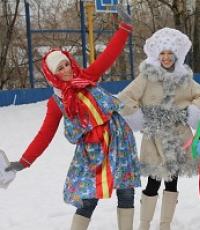
So, here we have the original photograph, which shows a woman in a red dress.
Original image
And here is the image that we will get after performing all the necessary manipulations. The entire photo will be converted to black and white except for the red dress. Again, we won't resort to using any selection tools.

Final image
You can follow all the steps in this tutorial while working with your own photo. Just select a photo and identify an object that will remain in color, it could be a dress, a flower, a telephone booth, in general, anything. Let's get started already!
Step 1: Black & White Adjustment Layer
Only after opening the program, you will see in the layers panel that the document so far contains only one layer - the Background layer - which is the original image.

We will create the effect using a non-destructive method, i.e. Let's leave the original image untouched and apply selective color replacement using a separate adjustment layer. Click on the New Adjustment Layer icon at the bottom of the layers panel:

Click on the New Adjustment Layer icon
From the list that appears, select the Black & White item:

As the name of this adjustment layer tells us, it is used to convert a color image to black and white. Now let's look again at the layers panel, as you can see, above the Background layer there is now a new Black & White adjustment layer.

Photoshop placed a new adjustment layer on top of the image layer.
We see that the program itself translated our color photograph in black and white, using default settings. We can independently adjust the parameters of the black and white image, which is what we will do now.

Convert to black and white by default.
Step 2. Adjust the settings for converting to B/W
You can find all the controls for the Black & White adjustment layer in the Properties panel. Here you will see six sliders, three of which are responsible for the primary colors (Red, Green and Blue) and the next three for the secondary colors (Yellow, Cyan and Magenta). Move the slider to the left to darken, to the right to lighten the area of the image that contains given color in full color format.
For example, moving the red slider to the right will cause the area of the image that originally contained red to become lighter. And by moving the slider responsible for Blue colour, to the left, we will darken the areas that were originally blue. You should not thoroughly memorize the colors of all image elements, since this is easy to understand by moving the sliders. Do you like the result? Yes? Amazing. No? Then keep experimenting with sliders.

Move the sliders to darken or lighten areas of the image based on their original color.
Above the sliders you will find the Auto button. This button sends a command to Photoshop, by which the program itself selects the parameters. Sometimes it works, sometimes it doesn't. But you can always correct the result yourself after using the Auto button.

If you want to compare your black and white version with the color version, simply click on the visibility icon (the eye-shaped icon) in the Layers panel to turn off the visibility of the adjustment layer. By turning it off, you will see your original image. To return to black and white, return the adjustment layer's visibility:
This is what my photo looks like after conversion. On at this stage there is no point in making everything perfect. You will see that we can always return to this point to make any changes.

Corrected black and white version
Step 3: Select the Brush Tool
One of the main advantages of all adjustment layers is the built-in layer with a mask. In this article I will not go into detail about how exactly masks work, but if you are interested, I advise you to find the material and read it. And although the mask is not visible to us in the image itself, we know that it is there because its thumbnail is displayed in the layers panel. Notice that at this stage the thumbnail is filled with white, which means that the adjustment layer is affecting the image layer underneath it.

We can reveal some of our color source image with an adjustment layer by simply painting over the mask with a black brush. Select the Brush Tool from the Tools panel:
Step 4: Select a Soft Round Brush
Click on any area open document Right-click (Ctrl key for Mac) to open the Brush Presets panel. Then select the soft round brush from the top left corner of the panel. Press Enter (Return for Mac) to close the window.

Select a soft round brush
Step 5: Change the Foreground Color to Black
Photoshop uses the Foreground color as the brush color. Since we need to paint with black using the layer mask, we should change the Foreground color to black. To do this quickly, press the D key. This command instantly sets the original colors for the foreground and background, namely white and black. To change them, press the X key on your keyboard. The foreground color should now be black.
We can see the current colors at the bottom of the toolbar. The foreground color is indicated by the square located at the top, and the background color at the bottom.
Step 6: Paint the inside of the object
To return the color to the selected object, first, arm yourself with a large soft brush and on the layer mask, begin to paint only the inner part with black, without touching the edges of the object. You can change the brush size using the keyboard. Hold down the key ] to increase the brush size, and the key [ , to decrease. To increase brush hardness, hold down Shift along with the key ] , and in order to reduce hardness use a combination Shift+[.
In my photo, I decided to return the color to the girl's dress. I use a large diameter brush to paint most of the object without worrying about the edges. I started from the bottom of the dress.

I then switched to a smaller brush and painted part of the top of the dress, again leaving the edges alone.

Notice that if we look at the layer mask thumbnail, we can see that the areas we painted in the photo are now showing up in black. This is how a layer mask works. The color white is used to indicate the areas of the image to which the effect is applied. The black color on the layer mask indicates areas where the effect is hidden.

Step 7: Paint the edges with a smaller radius brush
To accurately draw the edges of an object, you should first zoom in on the picture. You can also use convenient hotkeys for this. To zoom in on a photo, press and hold Ctrl+Spacebar (Win)/Command+Spacebar (Mac) and click on the desired area of the image. To zoom out of a photo, use the following keys: Alt+Spacebar (Win) / Option+Spacebar (Mac).
To draw finer details in the photo we will need a brush with a smaller diameter. To make the brush smaller, I press the left square bracket key several times. You may have to increase the hardness of the brush; I described how to do this using hotkeys just above.

Very carefully draw the edges of the object with a brush of a smaller diameter.
If you accidentally drive over the boundary of an object, there will be nothing wrong with that. For example, I accidentally drew a finger:

This error is very easy to fix. Press the key X to change the foreground color from black to white. Then paint over the area you touched with a white brush to get rid of the color. And then press the key again X to return black as the main color and continue working.

I continue to paint around the edges of the dress, zooming in and out and changing the hardness and size of the brush if necessary.

Final result:

Step 8. Make adjustments to the Black&White settings
At this point you may want to adjust the settings of the Black&White adjustment layer. To do this, in the layers panel, go to this adjustment layer and open its settings panel. Adjust the sliders until you achieve the desired result.

Additional step:
Since we only worked with one adjustment layer, we can easily reduce its effect, partially returning the photo to its original colors. To do this, we just need to slightly reduce the Opacity of the layer. You'll find this option at the top right of the Layers panel. I reduced the opacity to 75%:

This adjustment will allow the original colors to show through a little through the adjustment layer that sits on top of the image. Let's compare the Before and After photos again:

And here's the final image with the vibrant red dress taking center stage.
Color correction - changing colors and shades, saturation, brightness and other image parameters related to the color component. In this article we will talk about this operation and give a couple of examples
Color correction may be required in several situations. The main reason is that the human eye doesn't see exactly the same thing as a camera. The equipment records only those colors and shades that actually exist. Technical means cannot adjust to the intensity of light, unlike our eyes. This is why photos often look completely different from what we would like. Another reason for color correction is pronounced defects in the photograph, such as overexposure, haze, insufficient (or high) level of contrast, insufficient color saturation.
Photoshop has a wide range of tools for color correction of images. They are on the menu "Image - Correction".

The most commonly used are Levels(called by keyboard shortcut CTRL+L), Curves(keys CTRL+M), Selective color correction, Hue/Saturation (CTRL+U) And Shadows/Lights.
Color correction is best learned through practical examples.
Example 1: “Wrong” Colors
The “wrongness” of colors is determined either subjectively, based on the general idea of the photo, or is compared with real samples. Let's say we have a cat like this:

The lion looks quite tolerable, the colors in the photo are rich, but there are too many red shades. It looks a little unnatural. We will fix this problem using "Curves".

Result:

This example tells us that if there is any color in the picture in such quantities that it looks unnatural, you need to use Curves for photo correction. In this case, you can not only remove the red (blue or green) color, but also add the desired shade.
Example 2: Dull colors and low contrast
Another photo of a cat, in which we see dull shades, haze, reduced contrast and, accordingly, low detail.

Let's try to fix this with Levels (CTRL+L) and other color correction tools.

We can stop here. We hope that in this lesson we were able to convey to you the meaning and basic principles of color correction of photographs in Photoshop.
Before you start getting acquainted with color correction, it is worth clarifying that this topic is very broad. To engage in color correction at the proper level, it is better to take special courses where you will be taught the basics of color harmony, taught how to correctly combine colors and use existing methods and methods of color correction. And it is advisable to obtain a certificate. In the century digital technologies Photo processing is a very profitable business. And most profitable investment education has always been and remains a means.
We will look at the basic universal method of color correction.
Before you make color correction in Photoshop, you need to understand what it is and for what purpose it is used.
Color correction is a change in the colors, tones and saturation of an image, used either to improve the picture or as a creative technique. The first case may include the need to get more realistic colors or make the photo lighter. After all, when certain settings photographic equipment, colors can be conveyed distortedly, not the way we see them in real life. This also includes photo correction to increase color saturation to make the photo more attractive. In the second case, color correction will be suggested to you by your own imagination. This could be vintage color correction, fantastic colors of landscapes and the like.
Color correction in Photoshop is done on adjustment layers. If color correction is applied to an image layer, the changes to the image will be irreversible. Adjustment layers work like filters. All effects of the adjustment layer will be visible in the image below this layer. Also, the adjustment layer will allow you to make changes to the final result, if necessary. We discussed the topic of layers in a previous article.
Automatic color correction
The simplest and quick way for beginners - automatic color correction. Open the image in Photoshop, create a duplicate of the image layer ( Ctrl+G). Go to the duplicate layer and click Shift+Ctrl+B. This Photoshop command automatically adjusts the contrast and color of an image, automatically detecting shadows, midtones, and highlights.

This is what the pictures look like before and after automatic color correction.


Hue/Saturation
Open the image in Photoshop. On the layers palette, find the list of adjustment layers by clicking the half-filled circle icon.

Select from the list “Hue/Saturation”/Hue/Saturation.

In the layer settings dialog box, you can change “Hue of flowers”/Hue, "Brightness"/Lightness(make the photo lighter or darker) and “Color saturation”/Saturation(make faded or rich shades).

An image can be divided into color channels. The settings allow you to work with all color channels simultaneously or with one.
When working with a separate color channel, selecting a specific hue that needs to be changed, use the tool "Pipette". Click on the tool icon, move it to the desired area of the photo and make one click. You will see stops on the gradients. On color gradients, you can limit the color range, then changes will occur only in it. By moving the limiters, you set the operating range.

Next, by moving the hue, saturation and brightness sliders, all that remains is to select the settings according to your task. Let's give this photo a purple tint to get a more colorful sunset. To do this, select the blue channel. Drag the range stopper on the gradient to the right to capture the range of purple shades. Move the slider closer to purple Hue, add saturation. When finished, close the settings window.

That's how it happened.


You can learn even more about Photoshop in the course at Fotoshkola.net.
Curves
Adjustment Layer "Curves" has more abilities than we will consider in the basic method for beginners.
Open the image, call the adjustment layer "Curves" from the list of adjustment layers.


A settings dialog will open. Initially the curve appears straight. We are interested in the tool "Pipette". There are three of them. The first is responsible for shadows, the second for midtones, and the third for highlights.

Now we take the eyedroppers in turn: first click on the blackest part of the photo, second on the gray part, third on the whitest part.

With each dropper you use you will see changes. Curves of RGB color channels (red, green, blue) will appear on the graph. When finished, the curves window can be closed.

In the end it will turn out like this.


Levels
For the adjustment layer "Levels" We will also consider only the basic method of application.
A raster image, and in this case the image of our photos, consists of dots. These dots each have their own color. The black, gray and white points in the image are responsible for saturation, brightness and light. Adjustment Layer "Levels" allows you to change the point value level. Level 0 - black pixels, 255 - white. Level 128 - gray. The remaining levels range between 0 and 255. Redistributing the levels changes the tonal range of the image.
For quick color correction, you need to redistribute the level of midtones. Open the image, select from the list of adjustment layers "Levels".

In the settings dialog box, select the middle eyedropper, which is responsible for midtones. In the image, click on the area where there should be perfect gray. Then close the settings window. In this way, equal values of red, green and blue are selected.


As a result, we get a balanced, rich picture.


First lesson
Color correction in seven Photoshop lessons
1) Open the image:

2) add a “Selective Color Correction” adjustment layer with the following settings:
Yellow: -53, 64, -82, 21
Greens: 8, 73, -46, 0
White: 28, -17, 14, 0
Neutral: 0, -4, 21, 0
we get: 
3) Add a “Hue/Saturation” adjustment layer. In it we will decolorize the sky with the following parameters:
blue: -14, -49, -82

4) Add a new curves adjustment layer, go to the blue channel and set up the histogram something like this:

as a result we get:

5) Under the adjustment layers but above the main layer, create a duplicate of the image, convert it to black and white, reduce the opacity to 30%, change the blending mode to “overlay”. Afterwards you need to apply a mask of the following sample:

This will darken and give more contrast to the foreground:

6) Add a “Selective Color Correction” adjustment layer with the following settings:
Red: 0, 0, 12, 0
Yellow: 11, 21, 0, 0
White: 26, -10, 22, 9
Neutral: 0, 0, 5, 0
The last step is to create a new layer and apply a black to transparent gradient to the sky. Set the layer to the “Soft Light” blending mode.
And we get the final result:

Lesson Two


2) Add a new adjustment layer “Channel Mixing” and change the following settings.
In Blue
red: +3
Greens: +103
Blue: -18
3) Create a new adjustment layer “gradient map” and add 2 colors (030301 and e3d898):

Set the layer opacity to 30%. we get the result:

4) Create a new layer “Selective Color Correction” and set the following parameters:
Reds: -74, 0, 32, -22
Yellow: 37, -24, 38, 0
White: 12, -4, 0, 0
5) Add a “Color Balance” adjustment layer with the following settings:
Mid tones: 11, 5, 0
Lights: 6, 2, 0
We get the following result:

6) Add a new adjustment layer “Curves” and play around in the blue channel:

7) Create a new layer, fill it with the color b2fb5c, set the layer to the “Screen” blending mode and set the transparency to 8%.
8) Add a new adjustment layer “Brightness/Contrast” and increase the contrast to the value: 11
9) Create a new curves adjustment layer. In the blue channel we will do the same thing that we did a few steps ago. And also drag the right slider in the RGB channel a little to the left:

10) Create a new adjustment layer “gradient map” and set the gradient from 6b186a to fa7901. Set the layer to Soft Light blending mode and set the opacity to 30%.
Final result:

Lesson three(from 06/14/2011)

So, open the original image:

1) Create a “Selective Color Correction” adjustment layer with the following settings:
Yellow: -89, 0, -52
Greens: -100, 36, 0, 0
Blue: -88, 0, 62, 0
We get the result: 
2) Create a “curves” adjustment layer and change the settings as follows:

3) Create a new adjustment layer “Color Balance” and change the settings to:
Midtones: 0, 0, -10
Lights: 0, 4, -3
We get the result:

4) Create a new adjustment layer “Selective Color Correction” and set the settings:
Yellow: -9, 0, 13, 0
We get the result:

5) Create a duplicate of the background, move it to the very top, lower the layer opacity to 20% and set the layer to the “Soft Light” blend mode.

6) Create a new layer, fill it with color 0f637e, lower the opacity to 20% and set the layer to the “Overlay” blending mode. We get the result:

7) Create a new adjustment layer “Curves” and set the following settings.

8) Create a new adjustment layer “Selective Color Correction” and change the settings:
Yellow: -51, 0, 36, 0

9) create a new adjustment layer “Brightness/Contrast” and drag the contrast slider to a value of +4
10) Create a duplicate of the main layer, move it to the very top, desaturate it, lower the opacity to 30% and set the layer to the “Overlay” blending mode.
After this, apply the mask to the model’s face and hands as follows:

11) Next, using the “color range” tool with a spread of 140-145, select the blue areas of the sky against the background, transfer this to a new layer at the very top, change the blending mode to “Soft Light” and lower the layer opacity to 50% and get the final result:

Lesson Four “Kytay Kostya Lee from OdEssa”(from 06/15/2011)

1) Open the original image:

2) Create a “Hue/Saturation” adjustment layer. Check the “Toning” box with the following settings:
color tone: 26
saturation: 25
We get the result:

3) Create a new layer and fill it with the color bb9980, change the opacity of the layer to 60% and carefully wipe the layer from everything except the exposed sky, which this layer should eliminate. We get the result:

4) Create a new adjustment layer “curves” and set the following settings in the red channel:

5) Create a “Color Balance” adjustment layer and change the middle channel settings to: 4, 0, 20

6) What follows is a more complicated procedure. Create a duplicate of the original image and move it to the very top. CAREFULLY, WITH A SOFT BRUSH we wipe everything except the skin and hair of the models. Set the layer opacity to 50 percent - this will be enough. We just added natural colors to the skin, leaving the image stylization the same:

7) Create a new adjustment layer “Selective Color Correction” and set the following settings:
Red: 0, -30, 13, 0

8) Create a new curves adjustment layer and slightly change the blue channel:

9) Create a duplicate of the original image, use the “Gaussian Blur” filter with a value of 5 pixels. Set the layer to Soft Light blending mode and lower the layer opacity to 30%.

10) Create a new curves adjustment layer and change the settings as follows:


11) Create a new adjustment layer “Brightness/Contrast” and drag the “Contrast” slider to a value of 13

12) Create a new layer and fill it with color 050f43, change the layer opacity to 60% and change the layer blending mode to “Exception”

13) Create a new adjustment layer “Curves” and play around with the blue channel:

14) Create a “Selective Color Correction” adjustment layer and set the following settings:
Yellow: -9, 0, 3, 0
15) Create a new layer, fill it with FBD264 color, change the layer blending mode to “Overlay”, and lower the layer transparency to 20%. We get the final result:

Lesson Five(from 06/19/2011)

1) open the image:

2) Create a “gradient map” adjustment layer and select the colors 210456 on the left and f77c03 on the right. Lower the layer opacity to 40%, blend mode “Normal”

3) Create a curves adjustment layer and play around with the red, green and blue channels:


4) Create a duplicate of the main layer, move it to the very top, desaturate it and lower the opacity to 40%.

5) Create a “Selective Color Correction” adjustment layer and set the following settings:
Yellow: -40, 45, 25, 0
White: 100, -60, 100, -35
Neutral: 10, 8, -15, 15

6) Create a duplicate of the previous “Selective Color Correction” layer and set the opacity to 40%, and change the blending mode to “Soft Light”

7) Create a new adjustment layer “Color Balance” and set the following settings:
Shadows: 5, 25, -20
Midtones: 25, 2, -10

9) Create a new adjustment layer “levels” and set the settings as follows:

10) Create a “Brightness/Contrast” adjustment layer and lower the brightness to “-4”, increase the contrast to “8”.
From which we get the final result:

Lesson Six(from 07/10/2011)

1) Open the original image:

2) Create a new adjustment layer “Selective Color Correction” with the following settings:
Yellow: -100, 40. -71, 0
Green: -100.5, -100.0
Blue: -100, -100, -100, 0
Blue: 100, -100, 100, 0
Neutral: 6, -3, -12, 5
we get the result:

3) Create a new adjustment layer “Hue/Saturation” and play around with the blue channel:
Color tone: -140
Saturation: -80
We get the result:

4) Create a new adjustment layer “Photo Filter”, apply a yellow filter with a transparency of 30%

5) Create a new adjustment layer “curves” and set the following settings:


6) Create a new adjustment layer “Color Balance” with the following settings:
Shadows: 10, 8. 20
Midtones: -8, -3, -22
we get the final result:

Lesson Seven(from 07/17/2011)

1) Open the original image:

2) Create a “Selective Color Correction” adjustment layer and set the following settings:
Red: 10, -100, -65, 0
Green: -100, 100, -100, 100
Magenta: 100, -64, 100, 100
Then we apply the mask to the model’s skin. We get the result:

3) Create a “curves” adjustment layer and play around with the blue and green channels:

We get the result:

4) Create a “Color Balance” adjustment layer and set the following settings:
Midtones: -5, 5, 25
We get the following result:

5) Create a “Selective Color Correction” adjustment layer and set the following settings:
Red: -15, -40, 0, 0
Yellow: 100, 100, -60, 0
Blue: 20, 0, 100, 30
We get the result:

6) Create a “Brightness/Contrast” adjustment layer and increase the brightness to “8” and lower the contrast to “-10”

7) Finally, create a “Hue/Saturation” adjustment layer and lower the saturation of the red color at our discretion to remove the “Mom, I’m so drunk, hic!” effect.
We get the final result:

Good day, friends. Surely you have heard more than once about color correction in photoshop. In that photoshop lesson You will find a detailed explanation of the principles and techniques of color correction.
You will learn:
- why do you need color correction?
- What Photoshop tools allow you to do color correction?
- color correction in examples
- how not to damage the image
Why do you need color correction?
Not long ago I wrote a lesson ““, but it showed only a special case of photo processing. The topic of photograph color correction itself deserves a separate discussion. First, it’s worth defining what color correction is and why it is needed.
So, color correction is changing the color components of the image (hue, hue, saturation, etc.). There are several reasons for color correction.
1. Sometimes we see a picture with some colors, but in the photograph we get completely different ones. This can happen due to incorrect camera settings (or due to poor quality of the camera itself 🙂) or the specificity of lighting (technical means are not able to adapt to lighting, as the human eye does, they only convey the real color spectrum).
2. Obvious color defects in the image. In this case, color correction helps to cope with highlights, too low (or high) contrast, haze, dull colors, etc.
3. Creative concept. Color correction benefits the artist/photographer/designer and adds expressiveness to the image. This also includes color correction of individual collage elements so that they begin to appear as a single whole.
Usually, color correction in photoshop is done by dividing the image into channels. Depending on the image editing mode, there are:
- Red, Green, Blue ( RGB model- Red Green Blue). The most popular image editing mode. It is with him that we will most often work.

- Cyan, Magenta, Yellow, Black ( CMYK model— Cyan Magenta Yellow blacK).

Remember, white color in a channel means that the color of this channel is present in the image in the maximum amount. Black - minimal. For example, if the red channel is completely black, this means that there is no red color in the image at all.
I believe now you understand what color correction is and why it is needed. So enough theory, let's move on to practice!
It’s not for nothing that Photoshop is considered the most powerful tool for image editing. In fact, the entire Image -> Adjustment tab is dedicated to image color correction:

Of course, we will not disassemble all the tools now. I will only note that the most important are Levels (Ctrl+L hotkey), Curves (Ctrl+M hotkey), Selective Color (Selective colors), Hue/Saturation (Ctrl+U hotkey) ) and Shadow/Highlights (Shadow/Light).
Color correction in examples
We have identified 3 cases in which color correction may be required. Now let's look at each of them using specific examples.
Incorrect color rendering
Let's take this photo of a tiger:

Have you noticed what's wrong here yet? That's right, too much red. Fortunately, this is easy to fix. Go to Image -> Adjustment -> Curves, select the red channel, and lower the curve like this:

Now let's see what we got:

That's much better, isn't it? In fact, curves are a very powerful tool that we will use many times throughout the Photoshop tutorials on our website.
So, if you see that a certain color is dominant in a photo and it looks unnatural because of this, go to Curves, select the channel with the corresponding color and lower the curve where there is an overabundance of this color.
Color defects
Look at this photo:

She's terrible. And now I’m not just talking about the quality of the photo itself. There are dull colors and a white “haze”. Let's try to improve this photo.
First of all, let’s remove the “haze”. The Levels tool will help us with this. Press Ctrl+L to open the level editing menu and set the following settings:

See the gap on the left? This is our “haze”; if we move the slider to the right, we will get the following result:

Much better already. But still “no ice”. Let's try to lighten the cat a little. Make a copy of the image (Ctrl+J) and go to Image -> Adjustment -> Shadow/Highlights. I selected the following parameter for shadows:

This made it possible to significantly brighten the image.
However, we only needed to lighten the cat, so create a layer mask and use a soft black brush to paint over the background:


Not bad. But I still don't see anything good in this photo. Let's go to Image -> Adjustment -> Photo Filter and apply a green filter (you can choose any other, for example warm):


I couldn’t resist and retouched this photo a little:

Creative concept
This is the most interesting, and most controversial type of color correction. To taste and color... But we will still look at several methods of artistic color correction in photoshop.
For the first example, I chose a pretty good source photo:

I applied Image -> Adjustment -> Photo Filter to it:

Then I created a new layer and filled it with color #f7d39e, blending mode Exclusion (Exception), opacity 25%

Create a copy of the layer, and apply Filter -> Render (Visualization) -> Lighting Effects ( Lighting effects) with the following parameters:

Layer blending mode is Normal. All that remains is to remove the intermediate layer with the fill and admire the result:

For the second example, I chose a photo of a girl:

Now we are implementing the popular “whitening” effect. Copy the layer (Ctrl+J), press Ctrl+U (Hue/Saturation) and set the Saturation to 0. The image will become black and white. Change the blending mode to Overlay, opacity 70-80%

And finally, let's try to give this same photo the effect of a modern movie. Reopen the photo and press Ctrl+M to edit the curves. Go into editing mode for the blue channel and add blue to the dark tones. At the same time, it is necessary to lower the curve for light tones in order to add yellowness and not lose skin color:

After such color correction in Photoshop, the photo looks like this:

Now let’s get rid of the purple tint by adding green to the dark tones:

And correct the skin color again:


Perhaps we will stop at this result.
How not to damage the image
Here I cannot give specific instructions, because to a large extent it all depends on your taste and sense of proportion. However, I will still say a few words:
- Whatever tool you use, take your time and give it a try. different variants, different parameters.
- Make duplicate images often and save the file at different stages of work, so that you can always return to an earlier result if something goes wrong.
- Develop your taste by viewing works good photographers and artists :)
That's all. I hope you learned a lot about color correction in Photoshop. And I say goodbye to you until the next lesson. Don't forget to leave comments and click on the social buttons 😉