Open lesson on computer science and office programs. Computer programs in computer science. Working with basic Microsoft Office applications
Computer science lesson notes "Computer Presentations"
Lesson objectives.- Learning Objective– formation of knowledge about the purposes of use, types, stages of creation, presentations, development of practical skills when working in the OpenOffice.org Impress program. Educational goal– fostering a positive attitude towards knowledge, developing the creative abilities of students. Developmental goal– formation of interest in this topic, communicative culture, improvement of mental operations.
- Show the significance of this topic in modern society. Introduce students to the concept of “presentation”, the types and stages of creating a presentation. Explore examples of presentation outlines. Introduce students to basic presentation development programs. Introduce students to the interface of the OpenOffice.org Impress program. Explore the taskbar of OpenOffice.org Impress. Apply what you have learned to create a test presentation in OpenOffice.org Impress.
During the classes:
No. Hello! Let's imagine that I am defending an information project on the topic “Inventions of the 19th century.” You are listeners. Would you be interested in listening to my report? Most likely not. Since the story includes the names of the authors, description appearance inventions, their capabilities. What would I need to include in my story so that you would be interested in listening to it, and the material would be better remembered? Of course, if the defense of my project is accompanied by images of the authors and their inventions, the main ideas are written and highlighted, then the listener , i.e. it will be more interesting for you to listen and this material will be better remembered. A person remembers and understands information that is presented visually better. Tell me, in what cases, in addition to protecting information projects, may you need demonstration material? What do you think you used before to demonstrate the material? That's right, in the old days, posters were drawn on sheets of whatman paper for these purposes, then projection technology appeared: epidiascopes, slide projectors, overhead projectors. Recently, these methods of demonstration have been replaced by computer presentations .Would you like to learn how to create such presentations and use them in everyday life? What do you think you need to know and be able to do for this? Tell me, is it possible to learn how to create presentations in one lesson? Well done! Thus, we can conclude that our work will be stage-by-stage. Today in the lesson we will get acquainted with the concept of “presentation”, with the types and stages of creation, study presentation diagrams, analyze them, and also get acquainted with the presentation development program and create a trial simple presentation .So, open your notebooks, write down the date and topic of today's lesson "Computer Presentations". What do you think the word “presentation” means? The word “presentation” means presentation, demonstration. Where do you meet computer presentations? In our lesson, my story is also accompanied by a presentation. What do I use to display the presentation from the monitor screen to the board? Correct , projector. It projects the contents of the monitor screen (in this case, the presentation) onto the board, which is the screen. (Projector demonstration). The more effective the presentation is, the more it uses the capabilities of multimedia technologies. Let's remember what "multimedia" is?Well done! So, in what case do you think a presentation is considered more effective? Of course, the more different media used in a presentation (text, graphics, animation, sound, video), the more effective it is. A presentation consists of pages called slides
.Think and write down in your notebook a more accurate, in your opinion, definition of a presentation. Let's hear what you got? Well done, you completed the task. Now we will summarize everything you said and write down what a presentation is. A presentation is a sequence of slides. A single slide can contain text, drawings, photographs, animation, video and sound.
But there are several types of presentations. Let's look at them. I will demonstrate two different types presentations, and you will try to understand how they differ from each other. (Demonstration of presentations. In the first presentation, the slides are switched manually, and in the second - automatically). So what about the first presentation? About the second one? What is the difference? That's right, the difference is in the change of slides. In the first example, the slides are changed manually, and in the second, automatically. These are two different types of presentations: a scripted presentation and a continuously running presentation.
- Presentation with script
– slide show under the control of the presenter. We see an example of such a presentation in computer science classes. There is a sequence of slides that can contain titles floating across the screen, animated text, charts, graphs and other illustrations. I am the presenter as I am accompanying the slide show additional material and I decide the time for each slide to be shown. This form of presentation is increasingly used in schoolchildren’s educational and extracurricular activities. Continuously running presentation
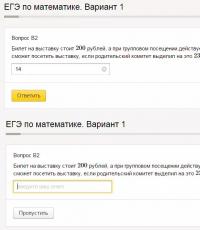
– there is no dialogue between the computer and the user and there is no host. You can find such presentations at various exhibitions. For example, at an exhibition of paintings by an aspiring artist, you may see a multimedia projector that projects on the screen a short video about the artist, containing his photographs, biography and main works. You are a spectator. This video has no host. The slides will switch automatically after a certain period of time set by the creator.
- Interactive presentation
– a dialogue is provided between the user and the computer. In this case, the presentation is controlled not by the presenter, but by the viewer (user), i.e. he himself searches for information, determines the time of its perception, as well as the volume required material. In this mode, the student works with a training program implemented in the form of a multimedia presentation. Let's look at an example. Let's say that in a computer science lesson the teacher gave you a training program implemented in the form of a multimedia presentation for independent work Houses. When you open this presentation, you see 1 slide, which is the content of this program. By selecting the desired topic and by clicking on it with the left mouse button, you will go to exactly the slide in which the topic you have chosen will be described. This way, you don't have to scroll through all the material to find the information you need.
Creating a presentation is a step-by-step process. Where do you think you should start if you want to create a presentation on any topic? That's right, first you need to think about what slides will be in the presentation and what they will contain. Thus,Stage 1 is creating a script. This stage plays an important role, since before creation it is necessary to think through the content of each slide, as well as the presence of a hyperconnection between them (if any). Therefore, the basis of any presentation is a diagram in the form of a system of interconnected slides. Consider the following diagrams: a) Start End
b)
Start End
How do you think these schemes differ? How will the presentation with scheme No. 1 be organized? That's right, the slides go sequentially one after another. Presentation with diagram No. 2? Here a hyperlink will be organized between the slides, i.e. the user can choose a different path for the slides. Let us conclude that scheme No. 1 is the simplest structure of the presentation. Scripted presentations or continuously running presentations can have this structure. Scheme No. 2 is complex structure presentations. An interactive presentation can have this structure. What will you do next, when the presentation script has been developed, the diagram has been thought out? You can move on to Stage 2 – development of a presentation using software.
To do this, you need to select a presentation development program. Each of the programs of this class has its own individual capabilities. However, there are many similarities between them. Each such program includes built-in tools for creating animation, adding and editing sound, importing images, videos, as well as creating drawings. Example programs:Microsoft PowerPointOpenOffice.org Impress We will get acquainted and work with the program OpenOffice.
orgImpress.
(The program demonstration is accompanied by an explanation) Impress is a program within OpenOffice.org for working with presentations. You can create slides that contain many different elements, including text, bulleted and numbered lists, tables, charts, pictures, and a wide range of graphics. Impress also includes prepared text styles, attractive background styles, and a convenient help menu.On first boot OpenOffice.org Impress a window appears on the screen Autopilot presentations.  In the first window of the wizard, you select the presentation type:
- empty presentation– creates a new presentation; from template– allows you to open a presentation from a previously saved template; open one of the presentations– opens an existing presentation.
 In the second step, set the slide style and presentation medium. You can set these options later, so you can skip this step and click Further.
In the third window, select options for switching between presentation slides. These parameters can also be set later. Next, click the button Ready. A window with a slide creation dialog will open.

This is the working area of the program OpenOffice. orgImpress. We see a menu bar (“file”, “edit”, etc.), toolbars. Tell me, which toolbars are already familiar to you? Where did you meet them? Indeed, this is the Drawing panel, the text editing panel, which we met in text editor OpenOffice.orgWriter. Toolbars allow you to create and format images, tables, diagrams, diagrams, work with text, etc. In the center of the window we see a blank slide, and on the right is a taskbar, which we will gradually get acquainted with. If you have not selected a slide background in the presentation wizard, then you can do this before starting work by selecting the “Page Backgrounds” option in the taskbar. This background will be the default for all subsequent slides. If you want to make a different background for each slide, then select the desired slide, the background you like, right-click on it and select “Apply to selected slides.” There is also a “Layouts” option in the taskbar. It allows you to select the desired location of subheadings, body text and other objects. To view a slide or presentation in full screen, you must press F5. Answer questions.
Student answers:Multimedia- This interactive systems, providing simultaneous work with sound, animated computer graphics, video frames and texts. Answer questions.
Think about the definition andwrite down in a notebook. The result is announced.
Write down a more precise definition in your notebook.
They look through presentations, analyze, find differences, and answer questions.
Write down the types of presentations and a brief explanation in a notebook.
Answer questions.
Write down the type of presentation and a brief explanation in a notebook.
Look at the example.
Answer questions.
They look at the diagrams, compare, and draw conclusions.
Answer questions.Draw diagrams.
Record the stage of creating the presentation.
Write down example programs and main features.
Answer questions.
Write down the main points of working in the program.
What kind of presentation do you think we can call the simplest? That's right, one that uses few media, for example, only text. Today in class we will create a test presentation, on the slides of which we will place text information. We will take the topic of our lesson as the topic of the presentation. Look in your notebooks and tell me what we can place on the slides of the presentation? Indeed, we can place the topic of the lesson, the definition of the concept of “presentation” and types of presentation. Place this information on 3 slides. Select the background of the slides, the necessary layouts. Formatting text in OpenOffice .org Impress is similar to text formatting in OpenOffice.org Writer. How can we change the font? What is meant by text formatting? That's right, you can change the text size, style, position, color. You can also use a bulleted and numbered list. So, let's get to work. (Practical work of students under the guidance of a teacher). Let's summarize. What did we learn in class today and what did we learn? Today in class we studied the topic “Computer Presentations” and created a test presentation on the topic of the lesson. Let's repeat:- Why do we need to study this topic? What is a presentation? What types of presentation are there and how do they differ from each other? What do you need to think about before creating a presentation?
Subject: “Creating a Presentation with a Script
in a programme OpenOffice.org Impress"
Lesson objectives.- Learning Objective– students mastering the knowledge system for creating computer presentations with a script, developing knowledge about changing slide layouts, ensuring understanding of the content educational material, continued development of practical skills when working in the OpenOffice.org Impress program. Educational goal Developmental goal
- Review previously learned material. Introduce students to the new features of the OpenOffice.org Impress program. Learn the features of creating a presentation with a script. Show an example of a presentation with a script and analyze it. Apply what you have learned to create a scripted presentation in OpenOffice.org Impress.
During the classes:
No. What can we place on a slide? We know how to place text on a slide and format it. Tell me, in order to create full-fledged presentations, is it enough to be able to work only with text? Of course not. What else can we put on the slide? Correct. Any presentation will be more colorful, brighter, more visual if it contains images. Let's remember how we inserted images into a text document? In the OpenOffice.org Impress program, the command for inserting an image into a slide is the same as in the OpenOffice.org Writer program. command “Insert” – “Image – “From file”, we can insert the desired image, located in the computer’s memory, into the slide. (Demonstration of inserting an image into a slide).Let's write it down in our notebooks:Inserting images into a slide: “Insert” – “Image” – “From File”.By inserting an image, we can change its size, add a shadow and other effects, and also place it anywhere on the slide. The program has the ability to work with the color of the image using the “Color” button.When changing size, it is important to maintain proportions. You can do this by pressing and holding the SHIFT key before resizing. (Demonstration of image editing). This way we can insert text and images into the slide. Let's compare the two presentations. (Demonstration of a presentation without animation effects and with animation effects). Tell me, how are presentations different? What else do we need to learn? That’s right, we need to learn how to add animation effects to all slide objects (text, images). This can be done by selecting the Effects option from the taskbar.
Select the object, on the taskbar in the “Effects” parameter, click the “Add” button and select the effect you like. The parameters of this effect appear below.

We can choose the speed and direction of the effect. By default, the appearance of this object will be made upon a mouse click, but we can change this by selecting in the “Start” item - “After the previous” / “Together with the previous”. In the order you configure effects for objects, in this order they will appear appear when viewing. (Demonstration of animation settings for slide objects). Try to create an algorithm for setting animation for objects yourself. Let’s listen to the results. Now let’s write down the resulting algorithm for setting animation for slide objects: Animation of objects:
- Select the desired object. Select the Effects option from the taskbar. Click the "Add" button and select the effect you like. Adjust the effect parameters.
Lesson plan for a lesson in computer science and ICT.
Subject: “Creating a continuously running presentation
in a programme OpenOffice.org Impress"
Lesson objectives.- Learning Objective– students mastering the knowledge system for creating a continuous presentation, developing knowledge about changing slide layouts, ensuring understanding of the content of educational material, continuing to develop practical skills when working in the OpenOffice.org Impress program. Educational goal– fostering a positive attitude towards knowledge, creating conditions for creative work students, the formation of students' creative abilities. Developmental goal– formation of interest in this topic, communicative culture, independence in carrying out practical tasks, improvement of mental operations, development of the emotional sphere.
- Review previously learned material. Introduce students to the new features of the OpenOffice.org Impress program. Learn the features of creating a continuously running presentation. Show the ability to change layouts in any way. Show an example of a continuously running presentation and analyze it. Apply what you've learned to create a continuously running presentation in OpenOffice.org Impress. Conduct individual work with those students who have difficulties working with the program.
During the classes:
No. Let's remember what it means - a continuously running presentation? That's right, in such a presentation there is no dialogue with the user and there is no presenter. Slides switch automatically after a specified period of time. Where do we find such presentations? Where can we use the ability to create this type of presentation? Today in the lesson we will talk about how to create such a presentation in the OpenOffice.org Impress program. We will also consider the possibility of changing the slide layout. Write down the date and topic of the lesson in your notebooks “Creating a continuously running presentation in the programOpenOffice. orgImpress». We can insert text and images into a slide and arrange them in accordance with the selected layout. Do the proposed layouts always meet our requirements? That’s right, the proposed layouts are not always suitable for certain slides. Therefore, it is easy to change the suggested layout in the presentation design program. When you select a layout, you will see that the text information areas are indicated by dotted lines. If you click on the border of this area, you can enlarge it, reduce it, move it to the desired location, and even copy it. (Demonstration of changing the layout).
So, what can we insert into a slide? What else can a slide contain? It is important to note that you can insert a diagram, table into a slide, and also create a diagram or image using the Drawing toolbar. All of these features are similar to those of the OpenOffice.org Writer program.

What needs to be done to make the presentation continuously running? You need to set the time for each slide. To do this, select on the taskbar "Change Slide" option.
Here we can select an additional slide transition effect and adjust its speed. And also in the “Change slides” item you can configure automatic transition through n seconds . Thus, your slide will “hang” for as long as you specified in this paragraph. You can also click the “Apply to all slides” button and the selected effect and time will be applied to all slides automatically. (Demonstration of slide change settings). Now try to create an algorithm for setting up slide changes yourself. Let's hear what you came up with. Take into account all the mistakes and write down the correct one in your notebook slide change adjustment algorithm:
- Go to 1 slide. Select the Slide Transition option in the taskbar. Choose the slide transition effect you like and adjust its speed. To create a continuously running presentation, select automatic slide progression and specify the number of seconds. If the timing of each slide is the same, click the Apply to All Slides button.
Lesson plan for a lesson in computer science and ICT.
Subject: "Creating an interactive presentation
in a programme OpenOffice.org Impress"
Lesson objectives.- Learning Objective– students mastering the knowledge system for creating an interactive presentation, developing knowledge about creating their own slide backgrounds, ensuring an understanding of the content of educational material, continuing to develop practical skills when working in the OpenOffice.org Impress program. Educational goal– fostering a positive attitude towards knowledge, creating conditions for students’ creative work, and developing students’ creative abilities. Developmental goal– formation of interest in this topic, communicative culture, independence in performing practical tasks, improvement of mental operations, development of the emotional sphere.
- Review previously learned material. Introduce students to the new features of the OpenOffice.org Impress program. Learn how to create slides with an original background. Learn the features of creating an interactive presentation. Show an example of an interactive presentation and analyze it. Apply the knowledge gained when creating an interactive presentation in the OpenOffice.org Impress program. Conduct individual work with those students who have difficulties working with the program. Conduct an oral survey on the main points of the topic “Creating a presentation in the OpenOffice.org Impress program.”
During the classes:
# OpenOffice.org Impress has standard page backgrounds that you use in your presentations. Will they always be appropriate for certain themes? That's right, sometimes these backgrounds don't suit some themes. Therefore, they create their own original backgrounds. We can find the background we like on the Internet. Then we need to insert this image into the slide. What commands can we use to do this? That’s right, “Insert” - “Image” - “From File”. Then you need to stretch it to fit the size of the slide, select the desired layout and click the “Send to Back” button on the bottom “Drawing” panel.
This way, your image will be the background, and on it you can write the necessary information and insert other images. But most often the image is very bright and the text blends into the background. Tell me that you need to increase the brightness or contrast to make it dimmer? That’s right, in order for the image to become dimmer, you need to increase its brightness. The “Color” button will help you with this.


- Insert the image you like, selected as the background (command: “Insert” - “Image” - “From file”). Stretch it to fit the slide. Select the layout you want. Select the image and on the Drawing toolbar, click the Send to Back button. To edit the image, use the toolbar.
Hyperlinks can be divided into two types:
- hypertext – a hyperlink is applied to a text string; hypermedia – hypercommunication applied to non-text objects (images, diagrams, etc.).
And on the first slide, a hyperlink will be applied to the text lines. Thus, by clicking on the line “History of the holiday” we will go to the slide where this story will be described. Similarly with the lines “Congratulations” and “Postcards”. But after reading the history of the holiday, we need to return to slide 1. To do this, create a “Back to Top” button and apply a hyperlink to it. And by clicking on this button, you can go back to 1 slide and select the next item. How can we create a button? Which toolbar can help us? That's right, the Drawing toolbar. A button can be created using any geometric shapes. Let's try to sketch a diagram of our presentation on the board. 
How many slides are there in the presentation? (4) And it is important to remember that first they create all the slides, design them, and only at the last stage they organize hyperlinks between the resulting slides. Organizing hyperlinks in OpenOffice.org Impress is quite simple. The main thing is to decide on the connections. In order to create a hyperlink, you need to select the desired line or object and execute the command “Insert” - “Hyperlink”. A window will open. On the left we select “Link to document”, find the line “Link to document element” and select a specific slide by number (page N).

(Demonstration of organizing hyperlinks between slides). Try to create an algorithm for creating hyperlinks. Let's listen to the results. Let's write down the resulting algorithm for creating hyperlinks:
- Select the desired line or object. Execute the command “Insert” - “Hyperlink”. In the dialog box, select Link to Document. Find the line “Link to document element” and click on the button to the left of the line. Select the number of the slide to which you want to move. Click Apply.
- What is a presentation? What types of presentation are there, and how do they differ from each other? What objects can we insert into a presentation slide? How to choose different backgrounds for two slides? How to give an animation effect to a slide object? How to make a presentation continuously running? How to make an original slide background? How to organize hyperlinks between presentation slides?
Lesson plan for a lesson in computer science and ICT.
Subject: “Creating a creative project “Me and my class””
Lesson objectives.- Learning Objective– generalization and systematization of knowledge on the topic “Computer Presentations”, checking the level of mastery of the material, continuing the formation of practical skills when working in the OpenOffice.org Impress program. Educational goal– fostering a positive attitude towards knowledge, creating conditions for students’ creative work, and developing students’ creative abilities. Developmental goal– formation of interest in this topic, communicative culture, independence in performing creative work, improvement of mental operations, development of the emotional sphere.
- Summarize the topic “Computer Presentations”. Summarize and systematize knowledge Conduct a test on the topic “Working in OpenOffice.org Impress.” Apply the acquired knowledge comprehensively and show your creative abilities when creating a creative project “Me and my class.” Combine the work received, analyze the results, summarize.
№
4. What is the name of the class of systems in which hyperlinking technology is applied to text elements?5. Write down the algorithm for setting up the animation of objects.6. Write down the algorithm for inserting a hyperlink.
OPTION II
1. What does the word “presentation” mean?2. Draw the simplest structure of a presentation.3. Complete the table:
Presentation type
4. What is the name of the class of systems in which hyperlinking technology is applied to non-text elements?5. Write down the algorithm for inserting an image into a slide.6. Write down the algorithm for setting up automatic slide changing. Today we will create creative project on the topic “Me and my class.” Each of you will create 2-3 slides on which you will place information about yourself, your photo and a photo of the class. What do we mean by the phrase “information about yourself”? You need to place the information about yourself that you consider the most important. Then we will combine all the resulting slides, add music and view the result. What do you think, since our presentation will look like a video, what type will it be? Correct, continuously running .Tell me, can there be hyperconnections in such a presentation? Of course not. Since a continuously running presentation does not provide for a dialogue between the user and the computer. Your slides must be designed, the text formatted, and animation effects configured for all objects. Let's get to work!
Let's save your work: “File” - “Save As”. Write down your last name as the file name. Let's transfer all the work to my computer over the network: “Home folder” - “Network” - “Samba Shares” - “20” - “Comp-masha” - “Documents” - “Project”. How How do you think we can combine all the slides? We will open a new presentation and copy your slides one by one and paste them there. (Combining slides). Let's remember how to make our presentation continuously running? That's right, we need to set the time for each slide. How do we determine the time for each slide? The time will depend on the amount of information on the slide. The main thing is that the viewer has time to read the text data and view the images. (Time setting). What do we need to make our presentation look like a short video? That’s right, we don’t have enough music for this. Let’s pick some music. (Listening to excerpts of several melodies). So, the melody is selected. Now let's learn how to insert music into our presentation. Let's move on to slide 1 of our presentation.In the taskbar, select the “Change Slide” option.Find the item “Sound” - “Other sound” and select the required melody from the computer’s memory. The program also has standard sounds that can be set for each slide.

Please note that you do not need to click the “Apply to all slides” button. Since when you click on it, you set this melody for all slides. That is, when you switch the slide, the melody will start again. Our creative project is ready. Let's look at the result. (View the resulting project, correct errors).
Subject lesson : Program Microsoft Office Publisher.Creation of educational products.
Lesson objectives:
1. Creation of educational products (knowledge of the Microsoft Office Publisher program, creation of a booklet), using publication templates supplied with Microsoft Office Publisher.
2. Development of creative abilities and interest in the process of cognition in computer science lessons.
3. Developing the ability to conduct dialogue, work culture, developing competence in the field of independent cognitive activity.
Lesson type: studying new topic using heuristic dialogue.
Technologies used: heuristic learning through the creative-formative function of dialogue.
Lesson objectives:
Learn the principles of working in Microsoft Office Publisher
Acquire skills and abilities to work with the program
Create a booklet “Banknotes”
Equipment:
video projector, PC
files with materials for the lesson
Handout
presentation
Lesson plan:
1. Organizational moment.
2. Learning new material through the dialogue function
3. Creating a booklet.
4. Reflection.
5. Homework.
During the classes:
1. Organizational moment. Good afternoon The topic of our lesson is “Program MicrosoftOfficePublisher. Creation of educational products. Booklet "Banknotes"
We have to study new program Office Publisher. Today we will switch roles. I usually ask you questions to find out how you understood a particular topic. In this lesson you will ask questions. You need, by asking me questions, to acquire necessary knowledge to create a booklet using Microsoft Office Publisher. This method is called by the method of heuristic questions.
Heuristic learning for a student is the continuous discovery of new things (heuristics - from the Greek. heurisko- I search, I find, I open).
The method was developed by the ancient Roman educator and orator Quintilian. To find information about an event or object, the following seven key questions are asked: Who? What? For what? Where? How? How? When? Paired combinations of questions generate a new question, for example: How–When? The answers to these questions and their various combinations give rise to unusual ideas and decisions regarding the object under study. Before you are statements famous people about the importance of questions and dialogue.
“A person’s question takes precedence over the answer” H.G. Gadamer
“A smart question is already half the knowledge” F. Bacon
“Human existence is always “being with others”, K. Jaspers
“The formation of some knowledge as a manifestation of the student’s creativity is possible when there are two consciousnesses, and, accordingly, only in the process dialogue » M. M. Bakhtin
On the importance of the ability to conduct dialogue in heuristic learning . ( Khutorskoy A.V. )
“The ability to conduct a dialogue is based on the ability to simultaneously hear oneself and listen to another person, see his “point of view,” and compare it with one’s own. A person who dialogues is a person who compares, and in comparison, as is known, NEW things are necessarily born: knowledge, emotion, creativity.
To dialogue is to differentiate an object into the smallest parts, find relationships between them and then arrange them in any order. That is, for creativity it is necessary to keep in sight both the small parts and the process of their synthesis itself.
Dialogue is the ability to simultaneously see both the particular and the general in any thing, phenomenon, or object of knowledge, reflecting the methodological principle of the unity of differentiation and integration. In that is creative-formative function of dialogue
The purpose of dialogue as a formcommunication – personal development through intercultural enrichment, revealing the student’s inner, creative abilities, while the goal of the monologue is the unidirectional transfer of knowledge and control in the form of a dictate of the externally prescribed content of education, suppressing the internal personal content of the student’s education.
Here, the student’s internal dialogue comes to the fore, which predetermines the paramount, logically logical significance heuristic learning.
It is based on educational activities design student own meaning, goals, content and organization of education.
Important types of student activity at the first stage of the student’s heuristic activity are separating knowledge from ignorance, asking questions, project activities on drawing up a goal-setting question. Dialogueization of this stage of student activity is aimed at strengthening the role of external dialogue.
The stage of cognition of the primary real educational object is correlated with the question “What?” and reflects differentiating the function of dialogue in heuristic learning.
The second stage of the student’s heuristic activity is comparison the primary result of subjective cognition of an educational object with its cultural and historical analogue.
This stage of comparison, essentially a dialogue between subject and object, is correlated with the question “How?” and defines the integrating function of dialogue.
The question "How?" defines activity part of the internal student content of education to search for analogies and relationships between the identified features of a real fundamental educational object at the first stage of its research.
The third, final stage of the student’s heuristic activity is the inclusion of his own educational result in the overall educational product. This type activity is correlated with the question “Why?”.
These three stages of a student’s heuristic activity are parts of one integral mechanism aimed at developing creativity student"
2. Learning new material through the dialogue function.
So let's get started! Your questions?
Suggested questions:
1. What is the program for?
Answer: The Microsoft Office Publisher program is part of the Microsoft Office suite, designed to create printed publications such as: booklets, newsletters, business cards, calendars, catalogs, envelopes, stickers, menus, announcements, postcards, posters, etc.
2. What is educational (educational products)?
Answer: By educational products we will understand the knowledge and skills of working in the programMicrosoftOfficePublisherand as a result, this is the booklet that we will create in this program.
(Educational products here mean firstly, the materialized products of the student’s activity in the form of judgments, texts, drawings, crafts, etc.; secondly, changes personal qualities students developing in the educational process. Both components—material and personal—are created simultaneously during the student’s construction of an individual educational process. Khutorskoy A.V. )
3. What is a booklet?
Booklet (French Bouclette - ring) is a category of printed products, usually printed on both sides and having one or more folds. Short guides, advertisements, programs, leaflets, etc. are published in booklet form.
The essence of the booklet is to contain, in a minimum area, the maximum amount of information that the owner of the booklet wants to convey to his audience. Another important feature of a booklet that distinguishes it from leaflets - on the one hand, and brochures on the other - is that the booklet does not have sewn pages, like a brochure, but is not a single-page sheet, like a leaflet.
The information in the booklet can be of both educational and advertising nature. The brightness and colorfulness for the booklet are prerequisite, because it should attract attention and arouse interest.
A competent booklet contains answers to the main questions that may arise in your potential audience. And if, moreover, it is “unusual”, then the booklet will set you apart from other proposals.
From the history of the booklet
Many people have heard the word “Booklet,” but few have thought about what is meant by this concept. The term itself - “booklet” - came to us from France, and it meant “fold” or “twist”.
But it denotes not only the type of printing product, but also much more. For example, in architectural art this is the name given to ring-shaped decorations made with one or several rows of “rings”. Since the 17th century, the word “boucle” has existed, which to this day refers to strands of hair and curly locks. That is bookletthis is the similarity of form and execution.
So the name itself tells us that a booklet is paper folded one or several times. More often there are booklets folded twice or three times, but more complex booklets - “accordions” – can also be found.
The history of the booklet can be counted from the time when humanity invented writing. With such a starting point, the booklet becomes so ancient that it is almost impossible to find its roots. There is a second possible starting point - the invention of printing. When the word first became printed, of course, printed forms, aimed at informing or offering products. This reference point makes the booklet look much younger.
However, one can find another starting point in the history of the emergence of booklets. This point is determined by the emergence of the modern classical form of the booklet: a sheet that is folded in one or several layers, distributed freely and intended to inform a certain segment of the population about services, goods, or certain phenomena.
If we consider the booklet from the last position, then we can assume that the booklet in its modern form was formed at the end of the 19th - beginning of the 20th centuries. It was at this time that new inventions in printing, the emergence of such a thing as advertising, led to rapid development various types advertising products, including booklets.
(Several booklets are shown, Appendix 1.)
How to launch the program Microsoft Office Publisher?
Start - All programs — Microsoft Office — Microsoft Office Publisher
Let's launch the program.
The program window opens.
How to choose a booklet?
Left: New Publication – Start with Layout – Print Publications – Booklets (Informational, Price List, Event, Charity)
What type of booklet should I choose?
We choose information ones.
The right panel will display layouts of information booklets. You can view them by moving the cursor from one layout to another (without clicking). Click the selected layout once.
How to choose a color scheme?
Click Color schemes and choose the design you like. You can create your own color scheme for body text, hyperlinks, viewed hyperlinks, headings, borders, shadows, etc. To do this, click the link Custom color scheme at the bottom of the screen and go to the tabCustom. You can save the created diagram. To do this, click the buttonSave the scheme in the window that appearsSaving a schema enter a schema name and clickOK. The created scheme will appear in the list of available color schemes. ClickOK.
How to choose a font style?
To select a font style, clickFont scheme and in the list that opens, use the scroll bar to view the proposed options. Once selected, click once.
How to fill out the booklet?
Fill in the text boxes with articles on the suggested topic.
Find and place the images in the planned locations.
If required, create captions for the images.
If available, fill out the table template.
Add design elements to the booklet.
Save the completed booklet.
Note All banknote data is located in the folder For students to read - Banknotes.
3. Creating a booklet.
And so, the main issues are resolved. You can start creating your booklet. As you work, you can ask any questions you may have. I wish you success!
4. Reflection.
Booklets have been created. They can be used to determine the level of mastery of new material.
What was unclear during the work?
Think about what prevented you from achieving the desired result?
Do you think the objectives of the lesson were completed?
5. Homework.
Create your own business card using MS Publisher templates.
Annex 1.


Appendix 2.
Setting booklet options
Publisher creates the layout of your booklet using special frames called “placeholders”. By clicking inside any frame, you can replace the placeholder text and images with your own.
Entering text into existing text frames
Click inside the text frame. All "placeholder" text will be highlighted. After that, start typing. The typed text will automatically replace the layout text.
Entering Headings
1. For convenience, zoom in on the screen by clicking the buttonLarger on the toolbar.
2. Move your cursor to the workspace and click in the leftmost column of your booklet. The text will be highlighted. Enter the name of your bookletBanknote.
Click in the text frameOrganization motto and type your motto. The motto is intended to clearly highlight the goals and objectives of your organization.
Note In field Organization motto It is not necessary to type exactly the motto. You can use this field to enter any other text.
If you want tochange the width or height of any frame , click its border once. Move the cursor to one of the white markers that will appear around the perimeter of the frame and drag it in the desired direction. Enter the required text in the frames.
Once you have completed the first page of the booklet, move on to the second. To do this, click on the appropriate page number2 on the buttonMoving Bypages (in the status bar at the bottom of the screen).
You can insert a text file using the commandText file menuInsert or from the clipboard. If all the text does not fit in the text frame,Publisher will suggest using autoflow. If you answerYes, the program will automatically place all the text, while creating the necessary connections between text frames.
Adding text fields
Any layout by default contains a certain number of text fields. However, sometimes there are not enough of them or their arrangement does not suit your design. In these cases, you can add new text fields:
Click the buttonInscription on the toolbarObjects on the left side of the screen.
Move the cursor to the work field and place it in the place in the document where you want to place the text. Hold down the left mouse button and drag out the text frame, starting from the top left corner and ending at the bottom right corner where you want the text to end.
Click inside the text frame to begin entering text.
If necessary, you can change the text style (font, size, style) using the toolbarStyles and formatting, and only after that start entering text.
Replacing patterns
The booklet layout has graphic fields into which some pictures have already been inserted. As a rule, they need to be replaced with your own.
To replace an image in a booklet, double-click the existing one.Publisher will open the task paneInserting a picture. You can chooseCollection of pictures orCollection of pictures on the Internet, by clicking the corresponding label once. WindowInserting a picture can be called up by selecting from the menuInsert teamDrawing and clickingPicture.
Click the buttonFind.
Grouping and ungrouping objects
Grouping combines objects so that you can work with them as a single object. All group objects can be reflected, rotated, and their sizes or scales changed. In addition, you can simultaneously change the attributes of all group objects (change the fill color or add a shadow to all group objects, etc.), or select the desired element within a group and apply the attribute to it without first ungrouping it. You can also create groups within groups, which helps when creating complex graphic objects. A group of objects can be ungrouped and then regrouped at any time.
To group objects:
Click the buttonSelecting objects on the toolbarObjects. While holding down the left mouse button, draw a frame (outside) around the objects that you want to combine into a group.
In the lower right corner of the selected group of objects, click the buttonGroup objects .
To ungroup objects:
Click once on the group of objects you want to ungroup.
In the lower right corner of the selected group, click the buttonUngroup objects.
Inserting and deleting pages
If you do not have enough pages to post the material, add them.
On the menuInsert select teamPage. Set the number of new pages, their location and appearance.
After setting the options, clickOK.
If the booklet contains pages you do not need, remove them.
Go to the page you want to delete.
On the menu Edit select Delete page.
If you are removing only one page from a duplex, a window will appear. Deleting a page. Select the one you want to delete (for example, Only the page on the right) and click OK.
Inserting a drop cap
Sometimes the first letter of text that is highlighted (the drop cap) can help draw attention to the text or help fill out a page that doesn't have much text on it.
Select the paragraph in the text where you want to enter a drop cap.
On the menu Format select team Initial letter.
In the dialog box that opens, select a drop cap style.
Note On the tab Arbitrary drop cap you can change the parameters of the drop cap.
“Pedagogical self-analysis of the lesson”
Pedagogical self-analysis of the lesson
Class: 8v
Item: Informatics
Equipment:
Lesson type: a lesson in acquiring new knowledge, skills and abilities.
Lesson objectives:
Lesson objectives:
Help students gain an understanding of multimedia and become familiar with programs for creating multimedia presentations.
Fostering students’ information culture, attentiveness, accuracy, discipline, perseverance
Development of thinking, cognitive interests, computer skills, working with multimedia software.
Location of this lesson in common system lessons: Topic “Computer presentations. Multimedia programs" is designed for 3 academic hours, this is the first lesson on this topic.
There are 6 students in the class, of which 4 are girls and 2 are boys. Fulfillment of uniform requirements, combination of group and individual work, discipline of the class helped to achieve the lesson goals.
The discipline in the lesson was good, the students completed their assignments in an organized manner. The students showed visible interest in the subject they were studying.
The structure of the lesson corresponds to its goals; the lesson was conducted using the technology of critical thinking. Based on the goals, it was chosen following structure lesson, which consists of the following stages:
Organizational stage (mutual greetings, checking the class’s readiness for work)
Updating knowledge and checking the assimilation of the studied material (students reproduce in memory the most important points topics studied that will be necessary to study a new topic. At the same time, you can check the level of mastery of the material from previous lessons, identify gaps, eliminate deficiencies, and develop the ability to listen and analyze answers.
Theoretical part. At this stage, an explanatory and illustrative teaching method is used. This form of work involves verbal, mechanical and visual memory, which contributes to the formation of long-term memory.
Practical part. At this stage, group work on computers was used, where we became acquainted with the stages of creating a presentation.
Summing up and setting homework. Homework involves consolidating knowledge and contains instructions for its implementation.
Conclusion: The goals set for the lesson were achieved, that is, the students developed: concepts about multimedia technology, computer presentation, and learned the stages of creation. During the lesson, I maintained a good emotional background in the class. The students showed attention and interest at all stages of the lesson.
The variety of forms and methods, as well as consistency in the construction of the lesson, made it possible to avoid monotony in the lesson and reload students.
View document contents
“Title for an open lesson”
Computer presentations. Multimedia programs.
Computer Science Teacher:
Petrova S.A.
Lesson objectives: know the concepts of multimedia technology, computer presentation, know the stages of creating a presentation and be able to apply these stages when creating a presentation.
The date of the: February 24, 2014
Lesson type: a lesson in acquiring new knowledge, skills and abilities.
Methods: visual, group, explanatory and illustrative.
Reception: dialogic.
Survey method: practical on a PC.
Survey type: combined (oral, practical).
Lesson structure: organizational moment, updating knowledge, theoretical part, practical part, homework, student questions, lesson summary, assessment.
Equipment: PC, mobile classroom, multimedia projector, blackboard
TOPIC: "Repetition of Microsoft Office applications"
Lesson objectives:
- Check knowledge of application programs Power Point, Paint, Word, Excel. , the ability to work with the basic elements of these programs., to form abstract thinking..
- Develop computer literacy, skills in working with text, pictures, tables.
- Bring up creativity, team spirit, accuracy.
Equipment: software Power Point, Paint, Word, Excel, instruction cards.
Lesson type: lesson-competition
During the classes
І Organizational moment
Teacher:Good afternoon! We are pleased to welcome you to our computer cafe. Today we have a review lesson. In this lesson we will review the main application programs Power Point, Paint, Word, Excel. The lesson will be held in the form of a competition, so the success of the team will depend on each of you. And our guests will evaluate our teams. Good luck everyone, we are starting.
So, first task. Let's remember the rules of behavior in the computer class. For each correct answer the team receives 1 point.
II Main part
Teacher: Since there are guests in the class who do not know our team members well, I ask the captains to present their team using Power Point (this was homework). Maximum score 3 points.
Competition "Virus"
Teacher: A virus got into the computer, it broke all the contents of the spreadsheet into parts and entered it into another table. Using the completed table, reconstruct original document in Excel. Maximum score 3 points (4 people from one team and 4 people from another team, complete half of the task)
| Address | Text | Address | Text | Address | Text | Address | Text |
| lk | |||||||
| Naob | |||||||
| Ska | |||||||
| shh, | |||||||
| ak | |||||||
Physical pause
Competition "Document Decoding"
Teacher: In the story by A. Conan Doyle, the criminal uses an original code to record his threats - he draws little men. The astute detective Sherlock Holmes solves this code and catches the criminal. Now a moment of attention: teams can earn 1 point by answering the question: “What is the name of the story about which we're talking about?"("Dancing Men").
Now the teams have to decipher the document. Time is limited to 8 minutes. (4 people from one team and 4 people from the other team complete half the task). (Get the text by entering the encoded text below. Format the text according to the given format parameters. Which are indicated in the curly braces preceding the text fragment to be formatted.)
Abbreviations used
+ - start from the "red" lineLine alignment:
- L- along the left border,
- R- along the right border,
- M- in the center,
- L-R- in width.
- Times, Arial- font type,
- 10,12,14 …-font size
Style:
- bl- bold,
- ital-italics
Encoded text:
(Arial 16 R bl) To the Director of the Ministry of Health No. 22 ( + Times 18 R bl ) T.V. Anokhina ( + Arial 16 R bl) from students (Times 18 R bl) 10 classes ( + Times 20 M ital ) statement. ( + Times 16 L-R) We ask you to allocate funds for the installation (Times 18 L-R bl ital) of completely new computers (Times 16 L-R) in the computer science classroom (room 14), and connect them to the Internet. ( + Times 20 L bl ital)03/16/2008 ( + Times 20 R bl ital) students of class 10-A
The finished document looks like this:
To the director of MZSH No. 22
-T.V. Anokhina
from 10th grade students
statement.
We ask you to allocate funds for installation brand new computers to the computer science room (room 14), and connect them to the Internet.
03/16/2008
students of class 10-A
Maximum score 3 points.
Competition "Draw a landscape"
Teacher: According to statistics, at about 1.5-2 years old, a child begins to take an active interest in drawing, creating his own “works” mainly on walls, doors, and windows. Those whose parents look at this disgrace approvingly grow up to be artists. And now we will find out which of the participants used parental approval
The whole team draws at one computer, approaching one person at a time. Participants are asked to draw a landscape. Each team gets cards with objects, each team member draws this object. Time is limited to 10 minutes.
Cards: sun, clouds, house frame, flower, river, inscription, windows and doors of the house.
Maximum score 3 points.
Competition "Annotations"
Teacher: Usually, any artistic, and not only artistic, work is preceded by an annotation that briefly describes its essence. Try to guess from these annotations what kind of fairy tale we are talking about. If you answer on 1 attempt, you earn 3 points, on 2 - 2 points, on 3 - 1 point.
- 1.1. attempt: The main idea of the work is that only long-term planning and foresight helps preserve not only health, but also life itself, both for one individual and for an entire team. The main characters of the work are close relatives, which, however, does not eliminate disagreements regarding the solution to the housing problem (3 points)
- 1.2 try: Two buildings built according to individual projects, do not withstand testing in artificially created difficult aerodynamic conditions
- 1.3 try: And only the foresight and ingenuity of the third relative, who preferred the standard design of a stone dwelling, allows everyone to get rid of martyrdom and even triumph over the eternal enemy.
- 2.1 attempt: The moral of the work is that excessive sociability and indiscriminateness in acquaintances leads to trouble.
- 2.2 try: At the first meeting, the title characters behave correctly and limit themselves to peaceful conversation. But the second meeting ends tragically - one of the interlocutors sees the light too late and becomes the victim of an insidious pretender.
- 2.3 try: And only the intervention of representatives of the oldest profession (workers of the local timber industry enterprise) restores the status quo.
III. Summarizing. Winner's reward ceremony.
IV.Homework
Today in class, in an unusual form, we repeated all the previously studied application programs. In the next lesson, we move on to learning a new application program from the Microsoft Office package. So at home, look at what program we haven’t studied yet.
"Computer programs" - Computer programs. Exist Various types computer programs. Every computer always has a “main” program, called the operating system. operating system organizes the work of all parts and all computer programs. Even bring pictures to life! Programs whose main purpose is to ensure the normal operation of the computer are called utility programs.
“Testing programs” - The main goals of testing programs. When developing testing programs, you need to choose the following. Using a specific color scheme when creating testing programs. Standard development tools, such as MS Office tools. Yellow color expresses the need for disclosure, change, and is focused on the future.
“Software in the computer” - Fik Group. Application software. Standardization and integration of software products. Representatives of graphic editors - Adobe Photoshop, Corel Draw. Rapid growth and rapid pace of development of the software market. Today, most systems are moving smoothly to the Web. Programming system. Software tools can provide assistance at all stages of software development.
“Machine translation of text” - Computer translation systems. The result of recognition is the character whose pattern most closely matches the image. Used when creating electronic libraries and archives by converting books and documents into digital computer format. In the recognized symbol image, geometric primitives (segments, circles, etc.) are identified and compared with vector symbol templates.
“Software lesson” - File managers (Total Commander, FAR. System software. Logical, strategic games. Anti-virus programs (Kaspersky Anti-Virus, DrWeb). Lesson objectives. Formation of a holistic perception of educational material in students. Translators of programming language programs into machine codes .
“PC Software” - System software. BY high level. Software PC. PC software configuration is multi-level (from low level to high). Low-level software. Background to the emergence of software. Training programs for self-education or in the educational process. Programming systems are tools for creating application programs.
There are a total of 33 presentations in the topic