We are building a chicken coop for broilers in the country for the summer. Design and construction of a chicken coop for broilers How to build a summer chicken coop for keeping broilers
Choosing the right location for your chicken coop will greatly simplify construction. There are a few key points, which you should adhere to when making your choice.
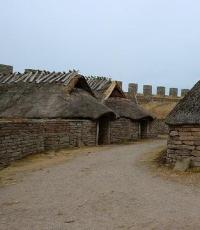
Chicken coop on the fence
- Orientation. It is important to correctly orient the poultry house to the cardinal points. The rectangular building is located from east to west along its length. Ideally, the place for the windows is marked on the south side, and the door on the east. With this arrangement there will be a maximum amount of light falling into the windows.
- Location. Ideally, the chicken coop should be located on a hill. Moisture in the lowlands lasts longer and it is more difficult for birds to provide good walking.
- Temperature. Both heat and cold have equally bad effects on birds. At temperatures above +30 degrees, birds stop laying eggs. On summer period Windows should be closed with special shutters. In winter, it is enough to maintain a temperature of +12 +15 degrees.
- Silence. It is important for birds to feel calm and safe. Give preference to a place away from home or road. A good idea would be to build a hedge around the chicken coop.
- Square. Choose a location taking into account the size of the poultry house. Each square meter of the building should be inhabited by no more than two chickens. A poultry house for 10 chickens will occupy a minimum area of 5 sq.m. It is important to provide space for a vestibule. This is a good element of insulation and winter period cold air will not penetrate directly to the birds.
Preparatory work
Having decided on the location, it is worth working out the drawings. Good example poultry house drawing in the photo.

Chicken coop layout for 10 chickens
You can see a sample marking of the area for the enclosure, entrance and vestibule, location of nests and drinking bowls. As well as the approximate dimensions of the building. In the minds of many, a chicken coop is like a dilapidated shed. However, housing for birds may well become a decoration for a summer cottage.
It is important to stock up required quantity beams and boards. It is easier to build from wood, the material is quite easy to use and environmentally friendly, moreover, a building made of wood always fits organically into the landscape.

Setting up a chicken coop for 10 birds
To arrange the enclosure you will need several meters of metal mesh. In addition, you need concrete and brick for the foundation and insulation in the form of roofing felt. You can also use mineral wool.

It is advisable to properly insulate the walls of the chicken coop
Tools required for construction:
- hammer;
- saw;
- nails and screws;
- shovel;
- ruler with level.
Construction of a chicken coop
Foundation
Making a chicken coop for 10 chickens with your own hands is not as difficult as it seems. We have already decided on the tools and necessary materials, and prepared approximate drawings. There's no need to be professional engineer, to sketch out an approximate construction diagram. It is important to indicate the correct dimensions, location of windows and doors, and mark the enclosure.
Construction needs to start from the foundation. Even for a small poultry house it is necessary - the foundation provides good ventilation of the floor and protects against the penetration of rats and ferrets. The simplest option is a columnar foundation. Even old bricks and stone are suitable for it. The place for the foundation is marked using a thin rope and wooden or metal rods. In accordance with the drawings, we drive rods into the ground around the perimeter. We tie it with rope.
It is better to remove the top layer of soil, 20 centimeters.
Pillars made of stone or brick are built along the perimeter, which will become a reliable support for the structure. The maximum distance between the pedestals is one meter, and the depth of the hole under each is about 60 cm. Brick pedestals can protrude 20-30 cm above the surface.
Floor
The next point is creating the floor. A warm double floor is important for the health of chickens.

Another option is a mesh floor. It's easier to clean and has a pull-out tray underneath
It is done as follows: a “rough” floor is immediately placed on the foundation. It is easy to make from any materials or construction waste. A wooden beam, a thick layer of insulation, and then the main floor are laid on top of it. The boards must be smooth, without cracks. Recommended thickness 25 mm.
This design will provide the necessary ventilation and protect against freezing and blowing.
Walls
A chicken coop for broilers must have reliable and durable walls with a height of at least 1.8 m. Otherwise, the birds will feel limited in space. A good option for walls is a timber frame. According to the drawings, openings for windows are left. The fixed beams are sheathed with boards on both sides. It is also necessary to place insulating material (sawdust, mineral wool) between the boards.

Frame for chicken coop walls
The outside walls can be painted any color. Painting will serve as good protection against erosion and will save you from insects that spoil the wood. Windows should be easily removable and closed with shutters in case of heat or severe frost.
It is important to pay extra attention to them, because the abundance of light in the chicken coop directly affects the egg production of chickens.
Roof
Ideally, it is better to make the roof gable. This will provide sufficient space for storing equipment and feed. When drawing drawings, think about this point. After the ceiling is laid, it needs to be insulated. Expanded clay is good for this. The ventilation of the room is thought out in advance. Ideal ventilation will be created by two wooden boxes located at opposite ends of the chicken coop. To do this, one end of the box must be flush with the ceiling, and the second 40 centimeters below it. The dampers will help regulate the temperature in the chicken coop; in cold weather, they can completely close the ventilation opening. Slate or tiles are usually used as roofing material. It is important not to forget to lay roofing material under the roofing material.

Ready-made chicken coop with a gable roof
Finishing work
When creating a chicken coop for broilers with your own hands, special attention is paid to the internal space. It would be a good idea to indicate the location of perches and feeders on the drawings of the premises. Perches are a necessary element in arranging a chicken coop. When making calculations, you need to remember that each bird needs about 30 cm of personal space. That is, for 10 chickens you need at least 3 meters of perch. To make perches, it is best to use 40x60 mm timber. To avoid injuring the birds, the poles must be rounded.

Simple nests made from plastic buckets

An original feeder made of plastic pipes - the food will always be clean
Proper placement of perches - 60 cm from the floor and at a distance of at least 50 cm from each other. Placing perches on top of each other is unacceptable.
The chicken coop for broilers is equipped with feeders, nests and drinkers. A wooden box filled with sawdust or hay can be used as nests. To make cleaning the chicken coop easier, the floor can be covered with sawdust.
Aviary
The aviary plays an important role in the daily life of birds. This will simplify construction and help take into account all the details. The size of a good aviary is at least twice the size of the poultry house. If possible, place it in an area with green grass - the birds will receive healthy food during their walks.
The enclosure can be built using beams covered with metal mesh. In one of the sections there is a gate with a reliable bolt. Since chickens are birds, although not quite flying ones, it is better to make the ceiling out of mesh. Inner space can be supplemented with several perches, drinking bowls and a feeding area.

Aviary made of wood and mesh with dimensions
A chicken coop for 20 chickens and an aviary for it are built according to the same principle, but with larger dimensions. It is important to take into account that for such a number of chickens, the minimum area of the poultry house itself will be 10 sq.m., and the aviary will be about 20 sq.m.
Raising meat-type chickens requires creating conditions for the birds under which the production yield will be maximum. A feature of broilers is intensive fattening and rapid weight gain. Therefore, a chicken coop for broilers should be maximally adapted for mass fattening of chickens up to 3–4 months.
Differences in chicken coops for broilers and layers
Broiler chickens gain maximum weight by 3–4 months, after which they are slaughtered.
Therefore, the main features of a chicken coop for broilers are as follows:
- availability of natural and artificial lighting;
- absence of drafts;
- does not require heating (when raising poultry from spring to autumn);
- mandatory ventilation;
- does not need nests;
- You may need space for cages;
- when growing in cells - the presence of a feeder and drinker in each cell;
- for outdoor cultivation - the presence of an enclosure for walking.
The chicken coop for egg-bearing birds is additionally equipped with nests, and its dimensions take into account the maintenance of small batches of chickens and adult birds. 
Where to build on the site
Requirements for the location of the chicken coop on the site:
- On the north side, the poultry house should be protected from the wind by trees or another building. Accordingly, there should be free space on the south side.
- If the landscape is uneven, then the chicken coop is installed on a hill. In the lowlands there is increased dampness, including from groundwater, so the house will also be damp, and this is harmful for broilers.
Did you know?The ancestors of modern chickens are the Bankev chickens, which live in India. Their natural weight does not exceed 1 kg. Meat breeds bred by humans do not have the same resistance to disease as their wild ancestors, and therefore require mandatory prevention of infectious and other diseases.
Drawing up a project and calculating dimensions
First of all, you need to decide on the method of raising broilers:
- floor;
- cellular.
With a floor option for 1 sq. m place 3–4 broilers. When placing cages, the cages are installed in several tiers, and then in 1 section there can be from 10 to 30 heads. The minimum number of chickens in a cage is 10.  After determining the growing method, it is necessary to measure the site for construction and find out the maximum possible size of the future poultry house.
General requirements for the premises:
- The roof of the poultry house should be gable. Snow does not accumulate on it, and it warms up faster from the sun.
- The window should occupy at least 10% of the total wall area to provide sufficient natural light.
- The insulation used to cover the walls must be moisture resistant, maintain the indoor air temperature well, and be resistant to rodents and pests.
- When rearing in a poultry house year-round, it is advisable to equip a vestibule to limit the exposure of the flock to cold air.
- If broilers are raised using the floor method, then you will need to equip an enclosure. It may be completed later.
Calculation of room sizes:
- The standard cage height is 50 cm. When placing cages in 3 tiers, taking into account the minimum height from the floor of at least 60 cm, the minimum height of the poultry house is 2.1–2.5 m.
- The width of the chicken coop for broilers is at least 2.5 m, taking into account the width of the cages.
- The minimum vestibule size is 1.5×1.5×2.1.
If you equip a walking enclosure, then its dimensions are taken into account at the rate of: 4 broilers per 1 sq. m. 
How to build a chicken coop for broilers with your own hands
The construction of a chicken coop will consist of:
- site preparation;
- foundation markings;
- performing the foundation;
- installing a chicken coop frame;
- construction of buildings (floor, walls, roof);
- insulation;
- installation of lighting, ventilation, water supply systems;
- installation of internal poultry house equipment (cages or perches, feeders, drinking bowls).
Did you know?One of the largest meat breeds- gate. Average weight of a rooster of this breed- 7 kg. But there are also individuals of 10–12 kg.
Necessary materials
The poultry house can be built from wood materials, stone or brick. Each material has both advantages and disadvantages.  I would like to note the advantages of structures made from wood materials:
- they are much cheaper than brick buildings;
- they are easier to install and dismantle.
Regardless of the material chosen, the house still needs to be insulated to create a comfortable microclimate for growing chickens. For construction you will need a variety of materials.
For the foundation:
- sand and gravel for the pillow;
- pipes and fittings for columnar foundations;
- concrete.
For the chicken coop:
- beam;
- wood boards for cladding;
- boards, slats;
- insulation;
- bitumen mastic.

Tools for work
Tools:
- shovels and for transporting materials during foundation construction;
- hammer;
- roulette;
- construction cord, pegs for marking the foundation, brackets for fastening.
Step-by-step instruction
Before you start, prepare the tools for work, materials and check the dimensions on the drawing again. Preparatory work during construction includes clearing space for the chicken coop. The site is marked with pegs and construction cord in accordance with the construction plan.
Did you know?Broilers- These are birds obtained by crossing several breed lines. Initially these were the Cornish (paternal line) and Plymouth Rock (maternal line) breeds.
A layer of soil under the foundation is removed - about 20 cm. The removed soil can be used to create flower beds or be used to fill the beds on the site. 
Pouring the foundation and laying the floor
- Preparation of the foundation consists of making holes for the foundation pipes, installing these pipes and creating a cushion of gravel and sand in the pit between the installed pipes. The thickness of the gravel cushion is 20 cm. The columnar foundation is made up of pipes into which fastening fittings are inserted under the chicken coop posts. The inside of the pipes is filled with concrete. When the concrete hardens, a timber frame for the floor is secured to the reinforcement.
- The grounding depth of the pipes is 1 m. The distance between them is at least 0.75 m. The pipe must rise above the level of the gravel-sand cushion by 0.2 m, and the reinforcement for fastening the wall posts must be at least 0.25 m.
- To put the timber harness on the reinforcement, groove holes are drilled in it.
- Waterproofing is laid on concrete pillars. It can be roofing felt in 2-3 layers.
- The timber is fastened with self-tapping screws.

Construction and insulation of walls

Roof construction
The roof is made of hard wood. There are 2 options: with and without a small attic. The attic improves air exchange and helps extend the life of wooden elements. For a roof with an attic, the roof deck is made of boards or slabs. Then the ceiling beams are installed and the covering is completed.
For a roof without an attic:
- the main frame is mounted on support pillars;
- covered with boards and insulation, just like the walls.
The finished roof can be covered with slate or metal tiles. When installing the roof, you also need to install ventilation pipes. The height of the pipes is 2 m, the diameter is at least 20 cm. 
Setting up a chicken coop
Internal arrangement begins with the installation of a lighting and heating system for the nursery of small chickens (brooder). For winter breeding of broilers, a heating system is installed.
The walls are treated with lime, and the wooden surfaces are painted. The window is covered with mesh. Ventilation ducts or vents should be equipped with a mosquito net, since insects are the most active carriers of pathogens.
If the birds will be kept in cages, then first form and install the racks, and then the cages. They are equipped with internal or external feeders. Install an automated water supply system. If the birds are kept without cages, then install perches, drinkers, feeders, and also equip a tray for ash baths.
Important!Plastic and materials that are not resistant to moisture should not be used for lining poultry houses. By accumulating dampness, such material will serve as a basis for the development of mold and other fungi.
A manger for chickens (brooder) with air heating to +35 °C is installed separately. The air temperature in the rest of the chicken coop should not fall below +12 °C. If the temperature is too low, the broiler will spend the energy received from the feed on maintaining body temperature rather than on growth.
Video: practical advice on arranging a chicken coop
Installation of cages
When keeping poultry in cages, it is necessary to create racks for cage sections. Cages can be ready-made, purchased, or made from mesh. The cages are placed on metal or wooden racks in several tiers.
The minimum cage height is 50 cm. Increasing the height will provide the birds with more space. fresh air, which is important for disease prevention.
Feeders and drinkers
It would be optimal to place feeders on the outside of the cages on special mounts. Feeders are made from polypropylene pipes or other material. The size of the mesh cells near the feeder should be 14x14 cm - this will provide broilers with more comfortable access to food.
Important!Nipple drinkers for day-old chicks are equipped with a 3600 nipple, which can move in any direction, and for older ones - with a 1800 nipple.
An automated system with drinkers is installed on the inside of the cage. Instead, you can equip vacuum drinkers, but they will need to be installed in each cage.  Number of nipple drinkers - 1 pc. per cage of 10 broilers. The pressure throughout the water supply line must be the same.
Litter
Litter is a natural insulator that keeps the chick comfortable.
May consist of:
- straw;
- sawdust;
- husks;
- peat
Requirements for bedding are good moisture absorption, low risk of injury. The litter provides natural occupation for the bird and the implementation of natural reflexes - loosening and digging the soil. The thickness of the litter is at least 20 cm.
What else should you take care of?
To obtain the most productive indicators, it is necessary to observe the temperature, humidity and air exchange regimes in the room. To do this, artificial lighting, a ventilation system and a heating system are installed in the chicken coop. 
Lighting
The lamps should illuminate the poultry house evenly. According to sanitary standards, per 1 sq. m area should account for 4 W of light. You can install regular lamps, LED or energy-saving ones. Whatever lamps you install, the important indicator will be the duration of illumination, not the type of lamps.
Ventilation
Ventilation system capacity - 6 cubic meters. m per 1 kg of live weight. Ventilation can be done in the form of supply and exhaust pipes or using a fan.
Lack of oxygen can provoke disturbances in the functioning of the cardiovascular system of chickens and lead to a decrease in the productive qualities of broilers. Air currents should not occur at the level where the chicks are housed - this can cause colds.Video: ventilation in the chicken coop Anyone can build a chicken coop for broilers with their own hands. The selection of materials for construction depends on your preferences, while high-quality building materials are found in a fairly wide price range.
Did you know? According to research by Aviagen and Cobb, lighting color does not have any significant effect on weight gain in broilers.
Comfortable conditions for broilers will ensure high productivity of your livestock.
Was this article helpful?
Thank you for your opinion!
Write in the comments what questions you have not received an answer to, we will definitely respond!
15
once already
helped
An example of a fairly profitable modern farm business is the breeding of meat chicken breeds. Many poultry farmers choose broilers. This breed of chicken can gain a lot of weight if fed well. However, in addition to intensive nutrition, it is important to maintain the correct conditions for keeping poultry, taking into account some of the specifics of their rearing, fattening and stocking density. To do this, you need to understand in detail how to build a chicken coop for broilers.
First, you need to understand what distinguishes a broiler chicken coop from buildings for ordinary laying hens. It is important to understand that first of all distinctive features are based on different processes for keeping laying hens and broilers. Laying hens are more restless birds than broilers, and the latter are more voracious. They also do not need to be allowed to go for walks. In addition, ordinary chickens are bred mainly for their eggs and kept for a long time; broilers are slaughtered within 2-3 months, so they do not need places for nests, which is the first and one of the main distinctive features similar chicken coops.


Specific features of broiler chicken coops
- do not require nesting sites;
- minimum space requirements;
- warm structure;
- ventilation of the room and absence of drafts;
- lighting of natural and artificial types;
- comfortable floors;
- places for cells.
Advice! Feeders in broiler coops and drinking bowls should be placed in different corners of the building.
Video - Chicken coop for broilers
Methods of breeding broilers in chicken coops
There are two ways to keep broiler chickens in chicken coops:
- cellular;
- floor
The choice of method depends on the number of future poultry. Due to low costs, floor housing is preferable for large numbers of birds in private farming. In large-scale industrial poultry farming, cage breeding is now increasingly gaining popularity.
Benefits of Cell Breeding
Keeping broilers in cages significantly saves space in the room. Consequently, the cost of electricity used to heat the chicken coop, its lighting, and ventilation is reduced. Due to limited contact of birds with each other (neighborly contact), the risk of infectious diseases is reduced. Rational consumption of feed leads to savings due to the fact that the bird does not scatter it on the litter. Restriction of movement leads to accelerated growth of the bird's weight.


On a note! Keeping them in a cage speeds up fattening by 3-5 days.
Advantages of outdoor breeding
The main advantage is that there is no need to buy cages and equipment for them. This method also allows you not to remove poultry droppings on a daily basis, but to do it less often due to floor bedding. There are no problems with the paws, which develop when kept in cages. The quality of chicken meat is higher.


Broiler chickens are placed in a special box - a brooder, where they feed and receive the necessary heating and lighting.
A newly born chick needs a warm, bright atmosphere and regular feeding. In the natural environment, this is facilitated by chicken, and when kept at home, it is recommended to use a special room for birds - a brooder. It is very easy to build it yourself: at home or on a livestock farm. In this article we will take a closer look at how to make a brooder for chickens with your own hands.
How to choose a suitable place?
The choice of area for construction should be based on the following key points:
- The chicken coop should be located away from noisy roads.
- It is better to build the structure on a dry, elevated place.
- The shadow of trees and nearby buildings should not fall on the windows of the chicken coop and its southern part.
- The building should be tilted slightly in a southeast direction.


Let us explain the reasons for these recommendations. Many meat breeds are sensitive to loud noises and nearby traffic will make broilers nervous, which will reduce weight gain. An elevated place will help keep the room dry. In low-lying areas, water from rain and melting snow can accumulate, which will increase the dampness inside the chicken coop and contribute to the formation of mold, the growth of bacteria, and increased illness in chickens. The best option– sandy soil. If your site is swampy or clayey, then before construction it should be dried and sprinkled with a layer of sand. The shade from the trees will block the light and reduce the temperature balance inside the coop. Tilting the building to the southeast will make it more exposed to sunlight.


Advice! If there are strong winds on your site, then it is worth building a fence or planting a hedge of weaving plants on the side of the wind so that there are no drafts in the chicken coop.
During installation in practice, much fewer problems arise than at the design stage. An error in the design can make the process significantly more complicated. However, if the project is designed correctly, the correct drawings are selected and good materials are purchased, then it can be completed in a relatively little time with little money outlay.
Do-it-yourself installation has a number of advantages:
- Only you are responsible for quality installation work, doing everything conscientiously and firmly.
- You save on installation costs and gain experience that will help you in the future operation of the structure.
- During the installation process, you can refine the design data based on your new ideas.

At the design stage of the chicken coop, it is important not to make those gross mistakes that may require reworking the entire structure of the building or create additional installation problems. Let's look at the most important design mistakes in broiler chicken coops.
Lack of rodent protection
When designing, you must take into account that the chicken coop must be raised at a distance from the ground. The insulation layer must not be allowed to come into contact with the ground. This can lead to a threat from rats, which are able to chew through the tree and climb inside. It is recommended to fill the lower zone between the insulation and the soil with broken glass. Mice simply will not be able to dig close. Also, direct contact with the ground can pose a risk of flooding.

The appearance of rats near the chicken coop becomes big problem. Gnawed holes and stolen eggs are not the biggest troubles from their neighborhood. Many farmers are interested in the question: how to deal with rats in a chicken coop? In this article you will find the most effective ways getting rid of rodents.
Prices for rodent protection
Rat protection
Using unsuitable materials
Experts do not recommend using isoplats, plasterboard sheets, PVC plastic, or chipboard for cladding. They have the ability to accumulate moisture, which makes them easily destructible materials during heavy rainfall. At the same time, they can release toxic substances that are dangerous to birds. Mold can also form, making chickens sick.
What you should pay attention to when installing a broiler chicken coop:
- The chicken coop must be safe - protected from rain, hail, snow, and predators.
- Have a good foundation.
- Be fireproof.
- Be built from environmentally friendly materials.
- Well insulated.
- Have a ventilation or ventilation system.
- Do not have drafts or cracks.
- Heat with combi or wood stoves.
- Be well lit.
- Sit on a hill.


On a note! You can often hear that a broiler can grow in 1.5 months. up to 1.5 kg. This is not entirely true if you intend to raise birds at home. This growth can be achieved in factory-farmed poultry farming using antibiotics and growth hormones. In fact, broiler chicken for 1.5 months. reaches approximately 800 gr.
Necessary materials and tools for construction
To build a wooden insulated chicken coop you need to have the following approximate list of materials:
- wooden beam 100x50 and 100x100 mm;
- insulation;
- roofing felt;
- cement;
- brick;
- nails;
- pebbles;
- crushed stone;
- board 20 mm;
- construction resin;
- metallic profile;
- mineral wool;
- staples;
- self-tapping screws;
- roulette;
- building level;
- saw;
- screwdriver;
- drill;
- hammer.
Prices for timber
Wood, plywood and brick are usually used to construct wall coverings. The foundation requires sand, slag, cement and wood formwork. Roofing material and slate are used for the roof. Wood slats are used for partitions and rafters.
Video - DIY chicken coop
Chicken coop drawings for broilers
We invite you to familiarize yourself with the most interesting drawings of chicken coops for breeding broiler chickens.
The first option involves a large spacious enclosure, a place for perches and a vestibule.


In the second picture you can see the calculation drawing for a broiler cage with a feeder.

The following drawing is made in projection and also assumes a large closed enclosure.

If you plan to seriously engage in broiler poultry farming, then the version of the drawing for two tens of thousands of birds will be interesting.


For many farmers, a drawing for making a multi-tiered version of cages will be extremely useful.

In the last picture you can see a detailed detailed drawing of a broiler chicken coop.


Drawing No. 6 - Detailed project chicken coop
How to make a chicken coop for broilers with your own hands: tips for beginners
- It is better to make the flooring in the form of concrete or clay concrete screed. Before pouring it, you should sprinkle the perimeter of the future building with a mixture of broken glass, sawdust or shavings.
- Water barrier film helps to insulate the roof and keep the chicken coop free from moisture.
- In northern latitudes, the thickness of the main walls of the chicken coop should be from 20 cm.
- Don't forget to make windows in the chicken coop. Good ventilation will help keep your bird healthy. You should also take into account that the size of the windows should be at least 1/12 of the base area of the chicken coop.
- Take the time to put mosquito nets on the windows and vents. Midges and mosquitoes are very attracted to the smells of chicken droppings. For chickens, they pose a mortal danger because they can get into the nostrils, which can cause the bird to suffocate.
- The bird develops better under yellow lighting, which is characteristic of sunlight in nature. Regular incandescent light bulbs meet this requirement.
- Make ventilation holes in the walls (20 cm from the floor) and ceiling. This will significantly reduce unpleasant odors indoors and increase air circulation. In winter, they are closed to maintain a constant temperature inside.

Instructions for building a chicken coop for broilers
Drafting
First of all, on at this stage the dimensions of the planned structure should be determined. It is necessary to take into account the number of birds that will live in the chicken coop, and the characteristics of the building materials used during the construction process.
If the area for construction is limited, the requirements for the bird landing area should be taken into account. This breed of chickens does not need a lot of space to roam.
When planning a site for construction, you can use these recommendations for planting birds. In addition, a multi-tiered cage system can be used to save space. In this case, the upper tier should not be raised from the floor by more than 1.5 m.


Pouring the foundation and laying the floor
Before pouring, we dig a pit to a depth of 40 cm. Next, we lay supporting horizontal beams from wooden beam 100x100 at a distance from each other in the formwork of 20 cm and fill with sand-cement mixture. If you plan to use it exclusively in the spring-autumn period, then an option with a depth of 20 cm is allowed.
Prices for cement and basic mixtures
Cement and base mixtures

Our foundation should rest for 3 days. After they have passed, we check how dry it is. It may take some more time. Once you are sure that the foundation is dry, you can begin installing the floor.
The most suitable flooring material is wood, since it can retain heat for a long time and protects against sudden temperature changes. For waterproofing purposes, before installing a wooden floor, we lay sheets of roofing felt around the entire perimeter. We place the first crown, aligning the ends of the beams. Then every half meter we place logs on the edge. The space between them must be filled with insulation. Then we install the floorboards using the tongue-and-groove method.
You can insulate the floor using a bedding of hay mixed with peat or sawdust. The thickness of such litter should be up to 40 cm. It is important to remember that this type of litter contributes to the accumulation of ammonia vapors that are released from the droppings. These fumes are poisonous and the chicken coop must have a ventilation system.


Advice! A slightly sloping floor will help with cleaning the coop as water will drain into one corner along with dirt.
Video - Arrangement of a chicken coop for broilers
Construction of walls
The next step is building the walls. An important role of walls is to retain heat. It is recommended to make them from a frame made of beams. We install the walls at a height according to your drawing, leaving openings for windows and ventilation. Upon completion of fixing the beams, it is necessary to cover them on both sides with boards or plywood.
Advice! For normal brightness of natural light, the windows in the chicken coop should be equal in area to a tenth of the entire floor area.
The walls can be not only wooden, but also made of brick or concrete. In this case, their insulation is even more important.


Insulating walls in a chicken coop
Before starting work on upholstering the wall frame with plywood or boards, you should understand which side the insulation layer will be attached to. It is better if it is on the outside, as this will protect the walls of the chicken coop from freezing, and they themselves will not become a cold accumulator. Insulation with a thickness of at least 5 cm is laid between the frame beams.
In order to eat fresh eggs and poultry all year round, it is necessary to properly insulate the house for laying hens, providing them with a comfortable winter. In our article you will find step by step instructions for insulation of walls, floors and roofs. And also everything about installing a heating system in a chicken coop.
Thermal insulation material used for wall insulation:
- sawdust and shavings;
- straw;
- mineral wool;
- Styrofoam;
- polymer filler;
- foam rubber
Prices for mineral wool
Rockwool mineral wool
The most commonly used is mineral wool. The choice is determined by its high elasticity, which allows you to seal all the cracks. To avoid moisture ingress, it is covered with a vapor barrier and windproof film, secured with a construction stapler and slats are stuffed on top. For external decorative upholstery, you can use boards or siding.

Cheap and effective materials are moss and pine sawdust. The first one perfectly absorbs moisture and fights unpleasant odors. In the second case, the disinfectant and insecticidal properties are enhanced. Of the two options, we recommend choosing the latter. Sawdust is close to mineral wool in its thermal insulation properties. To slow down the decay process and reduce the risk of fire, they are mixed with copper sulfate, slaked lime and boric acid. The thermal insulation mixture is laid between two layers of boards, which are installed at the stage of wall construction. A factory analogue of this method of insulation can be a wood block.
Roof structure
When our walls are erected, we begin to build the roof. We make the roof from hard wood and lay roofing material around the perimeter. Do not forget to treat wooden structures so that insects cannot settle in them and increase their moisture resistance.
First we lay the flooring, then we attach the ceiling beams of the gable roof at an angle. The design of the gable roof makes it possible to avoid the accumulation of snow and rain, which additionally protects against high humidity in the room. The flooring must be insulated. There's nothing complicated about it. Expanded clay or ordinary coal slag can serve as insulation. We attach roofing felt sheets to the beams, then cover everything with slate or similar roofing material.


An important element in the roof of a chicken coop is the ventilation pipe. Its diameter is usually 20 cm. The length of the pipe must be at least 2 meters. We make a hole in the roof of the required diameter into which the pipe is inserted. In the chicken coop it is recommended that she protrude 20 cm.
On a note! The optimal air humidity should be 60-70%, and the temperature 12°C -16°C.
Interior work
The chicken coop construction process is almost complete. The final step is to complete interior works, such as laying electricity, installing a heating system, if required, installing cages for broilers, feeders, drinkers, laying out bedding.
A Buleryan stove, electric heating, or even pyrolysis boiler equipment can be used for heating. It is recommended to plaster the walls and cover them with lime. In the future, whitewashing should be done when replacing a batch of birds. Rodents and dangerous predators often sneak through cracks and uneven areas in floors. Check and be sure to seal with cement-sand mortar anything that poses such a threat.

Feeders are available in two types: hanging and floor-mounted. If in the first case only a few chickens can feed from one feeder, then the second type allows many birds to feed at the same time.
On a note! For normal intensity of artificial lighting, it is better to hang lamps at a height of 1.5-2 m from the floor, based on the calculation of 3-5 W per 1 sq.m of floor area.

Inside the chicken coop should be equipped with special baths with sand (or fine clay) and ash. Chickens can swim in them. This is necessary to maintain their feathers in normal condition and protect them from ticks and other insects. The baths can be made from ordinary plywood or any container with a wall height of 15-20 cm can be used. You can add a little garden lime to the mixture.
Before starting chickens, the floors can be sprinkled with fluff lime. 0.5 kg of lime is enough for 1 sq.m. The bedding is placed on top with a thickness of about 5 cm.
How to make your own feeder for broiler chickens
We will need a large diameter polyvinyl chloride pipe. Prepare a tee, plugs and your tool with which you will cut the pipe. First, we cut it into pieces: 70, 20, 10 cm. We put a plug on a 20-centimeter piece, which will become the lower end of our feeder.

We put the tee on the top with its side. We insert the longest pipe and close it with a plug. We insert a 10-centimeter section into the remaining part of the tee. We attach the made device to the cage with the bird and pour food into it.
How to make drinking bowls for broiler chickens yourself
It is not at all necessary to buy store-bought drinking bowls. Let's try to make a nipple on our own in a few minutes. We need: a stub, plastic pipe— 1 m, nipple.
First of all, we will drill small holes in the pipe at intervals of up to 25 cm. As a result, you should get at least 4 drinkers. We make a thread in the pipe by screwing a thread-cutting tool into it. We connect the two parts of the pipe. We place a prepared plug on one end to prevent water from draining. On the other we place a knee at an angle of 90°. The reservoir will be a small piece of pipe, which we will connect to the unoccupied end of the elbow.

Broiler drinker
We wrap the nipple well with a sealant and screw it in to the edge. This completes the creation of the drinking bowl. All that remains is to test the structure for possible water leaks and seal them.
The price for a finished chicken coop starts from 20 thousand and can reach up to 600 thousand rubles. It is clearly unprofitable for an amateur farmer to spend that kind of money on a place to keep birds. Is it possible to save money and build a reliable poultry house yourself? Of course, if you take into account the recommendations from our material. We tell you what and how to make a chicken coop for broilers with your own hands.
Features of a chicken coop for boilers
A poultry house or chicken coop is a structure in which domestic chickens live. It must provide the birds with the necessary living conditions: warmth, cleanliness, space for living and rest. If things are bad in the poultry house, the livestock will get sick, slowly gain weight and ultimately bring losses to its owner. Therefore, special attention must be paid to the design: saving on materials and neglecting details will lead to dire consequences.
Chickens are raised for eggs and meat: the first type is called “layers”, the second is called “broilers”. Laying hens and broilers require different housing conditions, and accordingly, the poultry houses for them will be different.
Characteristic features of chicken coops for broilers:
- Compactness. Broilers are restricted in movement so that they gain weight faster.
- No nests are needed to hatch eggs.
- Insulated walls. Broilers are especially sensitive to drafts and cold, so their place of permanent residence must be protected from this threat.
- Artificial lighting. Electrical wires are insulated from chickens.
- Ventilation. Moisture is contraindicated for chickens, so it is necessary that the room dries out without drafts.
- Electric lamps are required to maintain light and heat.
Next to the chicken coop, if space allows, you need to set up an aviary for walking. One bird needs 4 sq.m. The aviary is protected with a net: so that the chickens do not run out, and predators and wild birds do not get inside.
If there is no space for an enclosure, you can replace it with walking tunnels. These are pipes laid along the site. Their diameter should be 60-80 cm so that the chickens can move freely. It is better to assemble the tunnel from segments so that if necessary, it can be easily disassembled: to get a lost bird or to remove dirt.
The space required by birds increases in proportion to their growth. If on the first day of life 30 chickens can comfortably fit on 1 square meter, then after 55 days (slaughter time) - only 6 birds.
The chicken coop for broilers can be summer or winter
DIY construction
Farmers are interested in building a poultry house with their own hands because the cost of a finished chicken coop is very high: from 20 to 600 thousand rubles. Few people are willing to spend that kind of money on a place for birds; such expenses can reduce the economic meaning of the activity of an amateur farmer to zero. In addition, it is possible to build chicken coops for broilers yourself, even if you have never done anything like this. The main thing is to arm yourself with knowledge, draw up a competent project and bring it to life.
Construction will go through the following stages:
- Setting goals. We decide whether a summer or winter chicken coop is required, how many birds are planned to be kept, whether they will be broilers or layers.
- Collection of theoretical information. We collect information about the requirements for chicken coops, the characteristics of materials and other valuable information.
- Definition of building materials and tools. Buying, renting - it’s more profitable to rent some tools if you don’t have them in stock.
- Drawing up a project. Ready-made drawings are taken as a basis, for example, from the section of the same name below.
- Laying the foundation.
- Construction of walls and roofs, interior decoration, insulation.
- Electrical connection.
- Arrangement of an enclosure or walking tunnels.
- Introducing chickens.
Let's look at the key stages in more detail.
Selection of materials and tools
The materials that the chicken coop builder will use are divided into into 3 groups:
- for the foundation;
- for walls;
- for insulation.
The foundation is necessary for the structure because it creates the necessary temperature conditions in the room and guarantees the birds protection from the cold and rodents. It is worth constructing a strip foundation: a contour of reinforced concrete or wooden beams. The width of the foundation walls should not be narrower than the width of the walls being erected, otherwise excess pressure will be created. A chicken coop with a foundation will last much longer than any non-monumental structure.

The chicken coop can be built from wood. bricks, foam blocks or shell rock
Building materials for a poultry house must guarantee warmth to the inhabitants and be durable so that the owner does not waste time and money on repairs. For the construction of walls the following are used:
- wood or timber - for hobbyists and summer chicken coops for broilers;
- shell rock - limestone rock, are rectangular blocks, suitable for chicken coops for 25-30 birds;
- brick - for capital structures and livestock over 50 chickens;
- foam concrete - for poultry houses of any size, winter and summer.
Block materials simplify and speed up construction. The standardized block size allows beginners to design and build objects without serious difficulties.
A wall made of any material will have to be insulated. Chickens are very heat-loving. Consistently high temperatures guarantee healthy growth and absence of diseases. The most advantageous solution for insulation would be polystyrene foam: it is inexpensive, but has low thermal conductivity, which means it will retain heat inside. An alternative can be expanded clay, hay and sawdust, mineral wool, expanded polystyrene, stizol. It is not prohibited to combine different materials for insulation, for example, insulate the floor with expanded clay and the walls with expanded polystyrene.
The choice of tools depends on the selected materials. The standard list includes:
- shovel;
- hand drill;
- hacksaw;
- construction stapler;
- hammer;
- screwdriver;
- concrete mixer;
- level;
- roulette;
- rope.
Drafting
Before developing a project, the farmer sets goals: determines the number of birds, the type of structure (major or non-major, summer or winter), desired materials and estimated costs. The size of the broiler coop is key. It is tied to the number of birds in the population.
The number of birds that fit on 1 square meter of the chicken coop depends on their age:
- 1 day - 30-32;
- 5 days - 22-25;
- 10 days - 19-20;
- 15 days - 18-19;
- 20 days - 17;
- 25 days - 16;
- 30 days - 13;
- 35 days - 12;
- 40 days - 10;
- 45 days - 8;
- 50 days - 7;
- 55 days - 6.
When developing a project, it is important initially choose the right place to build a structure:
- lowlands and noisy places near highways are not suitable for poultry houses;
- it is impossible for the structure to stand in a place where melt and rain water flows;
- the optimal solution would be a flat area on a hill or slope;
- birds need silence, they are afraid of noise and loud sounds;
- chickens benefit from sunlight, position the structure so as to ensure maximum supply;
- the place should be isolated from the wind.

Warm winter chicken coops are built on a concrete foundation
Construction
How to make a chicken coop for broilers with your own hands? Construction will begin with the pouring of a concrete foundation. It sounds expensive and complicated, but you can’t do without it. The monumental foundation will protect future inhabitants from cold, drafts and rodents. For the construction, they dig a trench at least 30 cm deep, install formwork and pour concrete inside. The foundation must stand for at least 3-4 days: this way it will become stronger and provide the structure with the necessary strength.
Some people do without a foundation, especially if we are talking about a summer poultry house with wooden walls. True, upon contact with the ground, the tree will inevitably begin to get wet and rot quite quickly. To prevent this, line the bottom of the walls with iron.
After constructing the foundation, construction of the walls and roof begins. The order of work depends on the selected materials and the complexity of the design. The most convenient are bricks and block materials: it is easier and faster to build smooth walls of the required height.
The walls, floor and roof are insulated. The materials are described above. You can’t do without insulation: chickens are very heat-loving. At the same stage, all cracks are closed and drafts are prevented. When the “box” is ready, you can install perches, install feeders and drinkers.
Then the structure is connected to electricity. In advanced poultry houses, ventilation is installed. At the final stage, the enclosure is set up.
Interior work
- insulation;
- installation of perches, feeders and drinking bowls.
We have already repeatedly emphasized how important insulation is. Don't neglect this step. Even if you don’t have a lot of money to build a chicken coop, don’t be too lazy to make at least an economical option: hay, straw in briquettes, sawdust, expanded clay.
Regarding the placement of perches, that is different variants and diagrams. The optimal height is 60 cm.
Chicken coop drawings
See example drawings in the images below. The dimensions shown are guidelines only. You can adapt them to own situation: Just recalculate the values proportionally.

Chicken coop drawing No. 1

Chicken coop drawing No. 2

Chicken coop drawing No. 3

Chicken coop drawing No. 4
Litter selection
Floor arrangement is fundamentally important in chicken coops for laying hens. A light, non-insulated floor is enough for broilers, since they spend most of their time in one place and move little. As a rule, the floor is covered with wooden flooring and covered with straw, peat, dry leaves, fallen pine needles or wood shavings. It is important to constantly maintain cleanliness: otherwise, infections will spread in the poultry house.
The bedding material must meet 3 criteria:
- promote easy cleaning;
- be safe for birds;
- inexpensive for the owner (preferably free).
Each material needs certain preparation. For example, fallen pine needles must be ground up, because whole needles can harm chickens. Only needles with a minimum content of essential oils and volatile substances are suitable for bedding: they are collected in November.
Rodent protection
You can find out if rats have entered the chicken coop by the following signs:
- holes in walls and floors;
- holes in bags of feed and grain;
- ammonia smell;
- small black excrement.
At the construction stage, it is necessary to ensure the strength and integrity of the entire structure, to get rid of cracks and passages. A foundation, block materials for walls and careful insulation will help. If the walls and floor are secure, rats will not be able to get to the birds.
A rather interesting way to fight rats in a chicken coop is to get a cat. It will do a great job with 2-3 rats and will ensure the safety of the birds. Even the smell of a cat repels rats, so the problem will be solved quite quickly. Another option is other poultry, such as geese. If a rat gets into the barn at night, the geese will start cackling and alert you to strangers. Some farmers manage to train hedgehogs and dachshunds to fight rats.
You should approach traps and mousetraps with caution: they are no less dangerous for the inhabitants of the chicken coop themselves. The same applies to poisons that can accidentally kill birds.
If these methods do not help, install an ultrasonic repeller in the chicken coop. It works with a 100% guarantee: it causes great discomfort to rats and forces them to leave the room. At the same time, people and birds do not hear him. You can set a timer on the repeller so that it automatically turns on at night and turns off in the morning.
Conclusion
Even a novice farmer can build a poultry house on his own and will help him save tens of thousands of rubles. Preference should be given to block materials - shell rock or foam concrete - they speed up construction and guarantee the strength of the structure. A broiler coop requires electricity: chickens require extended daylight hours. There is no need to develop the project yourself. You can download a suitable drawing with all dimensions from our material.
As a rule, city dwellers grow vegetables and plant fruit trees in their dachas. But more and more people want to acquire some kind of living creatures. An excellent option would be to build a chicken coop with your own hands for broilers - photos and drawings, which will be offered in our article.
But first, let’s look at the main mistakes when building a chicken coop.
- The first and most common mistake is incorrectly calculating the size of the chicken coop itself. Very often we heard from novice poultry farmers that the initially built chicken coop for 10 or 20 chickens subsequently had to be either expanded or built several more. This is not only not economical in terms of space use, but also looks worse from an aesthetic point of view.
- The second point that is also worth thinking through very well is the design of ventilation. If there is poor ventilation in the chicken coop, there will be constantly increased humidity, which negatively affects both the growth of broilers and the productivity of laying hens.
- Thirdly, you should not skimp on bedding. The layer of straw or hay should be thick enough to provide comfortable temperature regime in the chicken coop. To make it easier to replace the bedding, you can initially lay linoleum on the floor.
- Also, you should not make mistakes with interior decoration. To cover a chicken coop, you should not use materials such as siding, chipboard, plasterboard or insulate it with mineral wool. The best materials for covering a chicken coop are natural wooden materials: clapboard or plywood.
The need to breed broilers in the country with your own hands arises for several reasons. The first one is high price for chicken and the second is the low quality of meat offered in markets and stores. Sometimes they sell chicken that is, to put it mildly, not the freshest. And sometimes fattened with the help of drugs that accelerate growth, but negatively affect the taste and nutritional qualities of the product. Building a chicken coop is worthwhile goal, for its implementation it may be necessary good advice. A screw foundation is the most suitable option.

This is a very negative point: chicken meat is the number one product for the sick, for people on certain diets and, of course, for small children. Chicken broth is prescribed to those suffering from gastrointestinal diseases and can only be beneficial if it is made from high quality meat.
What is the way out of this situation? It's simple, you need to raise broilers yourself and feed them with high-quality feed.
In addition, chicken manure is an excellent fertilizer for the garden and will undoubtedly help increase the productivity of your plot.
Features of the chicken coop
If you equip a normal room, then in a season at your dacha with your own hands you can raise not one, but two or even three numbers of broilers.
Let's say right away that DIY broiler chicken coop different from a laying hen coop. If laying hens are kept all year round and even bred, then broilers are kept for only two months, and then they are slaughtered.
This does not mean that some kind of hut is enough to safely keep the bird, but the room can be simpler, without much insulation. There is also no need for walking.
Laying hens in winter

Broiler birds are lazy and sedentary, which is why many practice keeping them in cages. This method has many advantages, primarily ease of maintenance. But there are also disadvantages, the main one of which is the high cost of a good cell structure. But even if you decide to keep broilers in cages, you still need a good room.
We will tell you how to build a chicken coop with your own hands for broilers in the country, which includes floor-based housing for the birds. The chicken coop for broilers should be built on the sunny side of the site. The sun's rays not only warm the room, but also disinfect the area. Also, by drying the area and room, they prevent the appearance of moisture in which pathogenic microbes can develop.
Like laying hens, broilers have natural enemies, these are small and large rodents, weasels, foxes, cats and kites. And the owner’s task is to prevent them from entering the room in which the chickens are kept.
It is for these reasons that when arranging a home for chickens in the country with your own hands, you need to make sure that it is capital and made conscientiously.
We make it ourselves
A chicken coop for broilers in the country can be made from the most different materials. Some recommend sheet metal, others recommend sheets of plywood or even sheets of composite materials like plastic. These designs have the right to life, but have one significant drawback.
In rooms with thin walls there are very large daily temperature fluctuations. The bird will be cold at night and hot during the day. This can have a very bad effect on the well-being of birds and, as a result, a decrease in the rate of weight gain.
It is also worth making sure that there is a utility room nearby in which you can store feed and equipment.
Tools and materials
fittings;
concrete mixer;
metal, rubber sheet or piece of linoleum;
nails board.
Step-by-step instruction
Like any building, you need to start building a chicken coop at your dacha with your own hands for broilers from the foundation. Its size depends on how many chickens you intend to keep. For example, for 50 chickens kept on the floor in a country house, a room of 2 by 3 meters is sufficient. This must be taken into account when drawing up drawings.
When digging under the foundation, you need to go about forty centimeters deep, about the same as its width.
A very successful solution for preventing rodents from entering is placing broken glass at the bottom.
We raise the foundation walls above the ground by 30-40 centimeters. This is done so that rodents and other unwanted guests cannot get into the chicken coop. Also, a chicken coop with such a foundation will always be dry.
We fill the floor with cement mortar or lay it out with bricks, and then we need to make a screed.
Why do some chickens lay snow-white eggs, while others are brown and yellowish?
When forcing walls, you need to provide not only space for windows and doors, but also for ventilation and installation of roof joists.
We lay down timber or logs. Before laying, they must be impregnated with a composition against bark beetle, rotting and fire.
Now it's time to lay the roof. Here the choice is yours; it can be slate, metal sheet or other material. The main thing is that there is no leakage.
Since in chicken droppings If there is a lot of ammonia, then ventilation is necessary, for this you need at least one pipe.
We install windows and doors.
In the summer, in order to better ventilate the room, we leave the doors and windows open. This is necessary, but on the other hand it is dangerous, since either the neighbor’s cat or even a more serious animal can sneak in. To prevent this, special frames made of chain-link mesh should be provided on windows and doors (the mesh should be small). If you can simply nail the windows on the inside, then the frame on the door should be removable.
Now all that remains is to tidy up the floors. First of all, make sure that they are easy to clean. To do this, it is better to lay either linoleum or a sheet of rubber on the concrete. A regular metal one may also work. The main thing is that there are fewer joints because they make cleaning difficult.
Broilers, as a rule, sit on the floor, but sometimes they also don’t mind sitting on a perch. Therefore, you will need to make sure that they are present in the chicken coop. Chickens of meat breeds do not like to climb high like laying hens, so you should not raise the perches higher than 40-60 centimeters above the floor. It is better to place them near the wall so that they do not interfere with cleaning the room.
We fill the floors with shavings, sawdust, hay or straw. It is undesirable to use old straw, since over time it becomes infested with various bugs and microorganisms.
The walls of the chicken coop need to be whitewashed with lime for disinfection. Every time after cleaning you need to treat the room. Now there are special preparations on sale, but if you don’t have any at hand, then a light pink solution of potassium permanganate may be suitable. It can be sprayed using a typical garden sprayer.
Now all that remains is to put up feeders or drinkers and populate the chicks.